Welcome to our second Dev Diary for our forthcoming WWI DLC Battles for Ypres
by Robert Carver
In our first dev diary we covered the first and second battles for Ypres in 1914 and 1915, as well as the Allied spring offensive at Messines Ridge in 1917. In part two we delve into the massive battles fought around Ypres from the summer of 1917 until the end of the war in 1918, where both US and Portuguese forces add to the nations duelling for control of the region.
Technology and Tactics
One of the main design goals is to show how warfare changed between 1914 and 1918, as each campaign is meant to feel like a different stage of the war.
Tanks
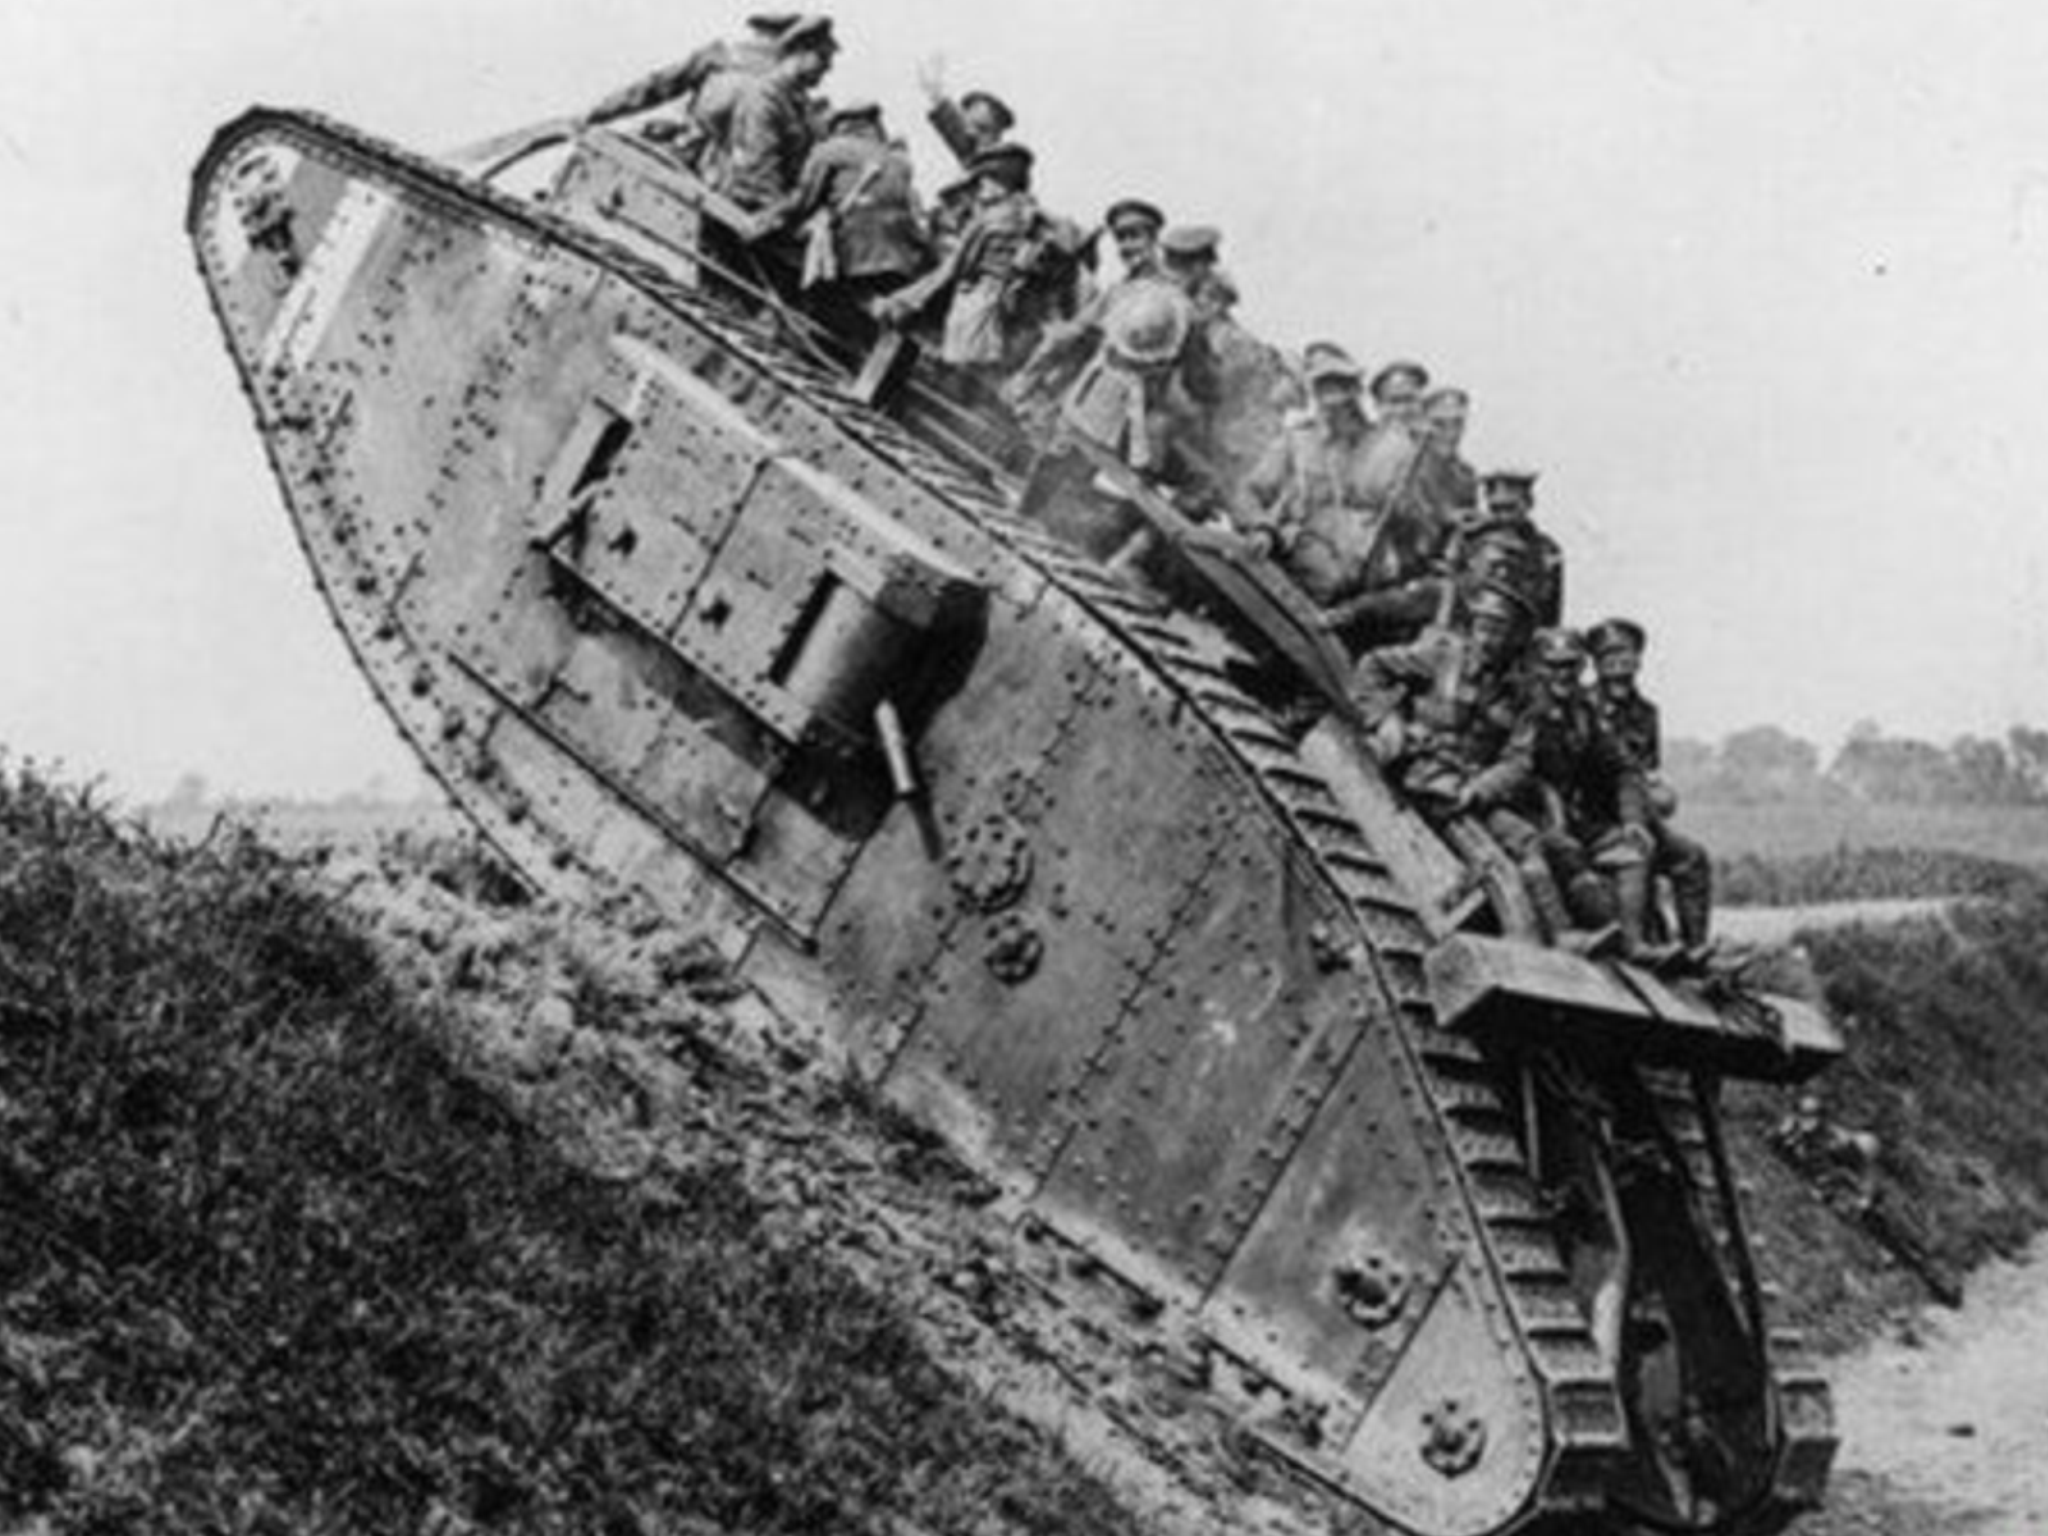
Tanks first appear in the 1917 Third Battle of Ypres campaign, and we designed them with their real limitations intact. They are strong in attack, vulnerable to counterattack, and often unable to operate effectively for long after the first push.
To model that:
-
Tanks are expensive to repair.
-
Tanks are difficult to rebuild.
-
Their combat values favor offense over defense.
-
They do not gain the same defensive benefits when occupying fortified positions that other units do.
By 1918, tank technology and doctrine improve, but historically the major tank concentrations are elsewhere during the German Spring Offensives. As a result, Entente tanks are not available around Ypres in these later campaigns. The battlefield feels modern, but it is still shaped by real operational priorities.
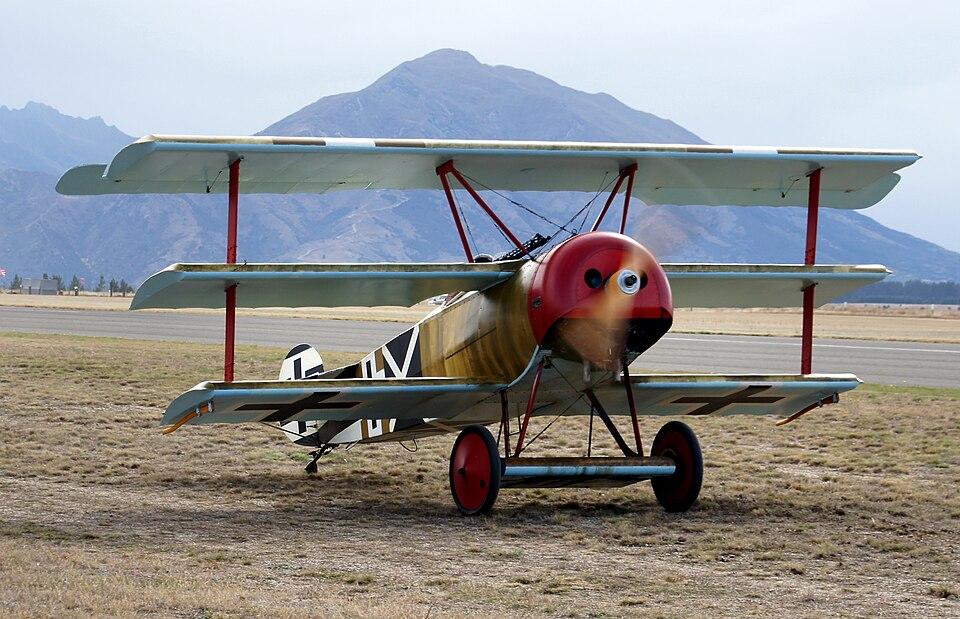
Aircraft
Aligned to the historical progression of World War One, air power grows sharply across successive DLC campaigns. The air war begins as observation, then a contest for the control of the air, and ends as a combined arms capability with direct battlefield effect.
-
Reconnaissance aircraft appear first in 1915: their role is limited, but important.
-
In later campaigns, reconnaissance becomes central to artillery coordination, uncovering enemy units and enabling bombardment behind the front.
-
Fighters arrive in 1917 and improve over time.
-
By 1918, tactical bombers appear and can directly impact ground units more than reconnaissance planes or fighters can.
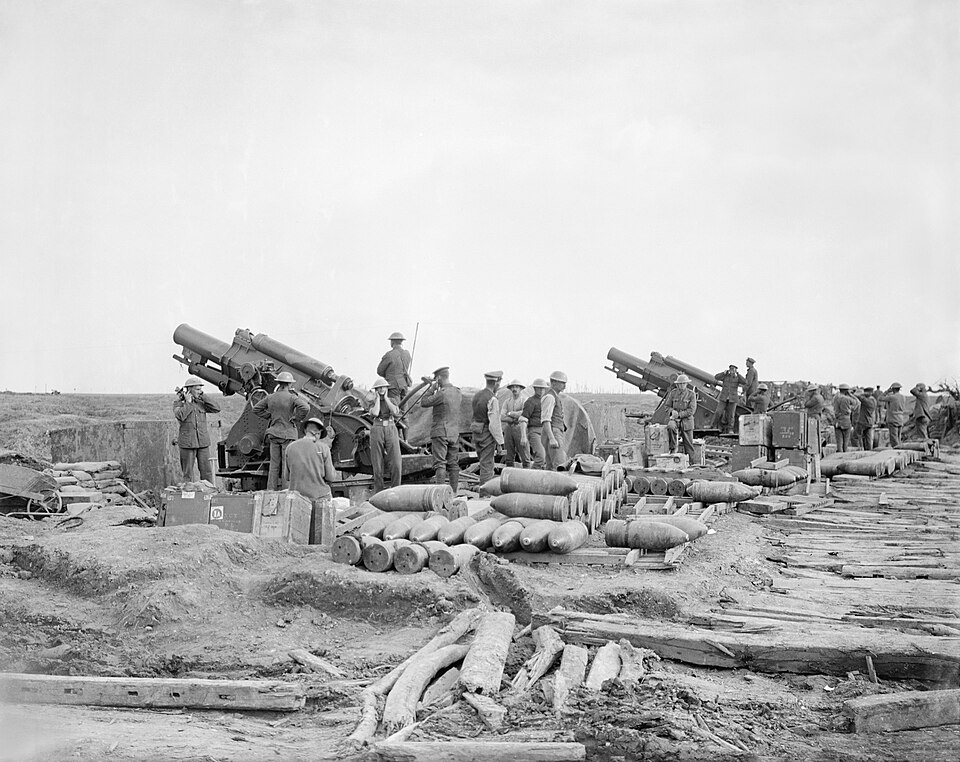
Third Ypres (31 July – 10 November 1917)
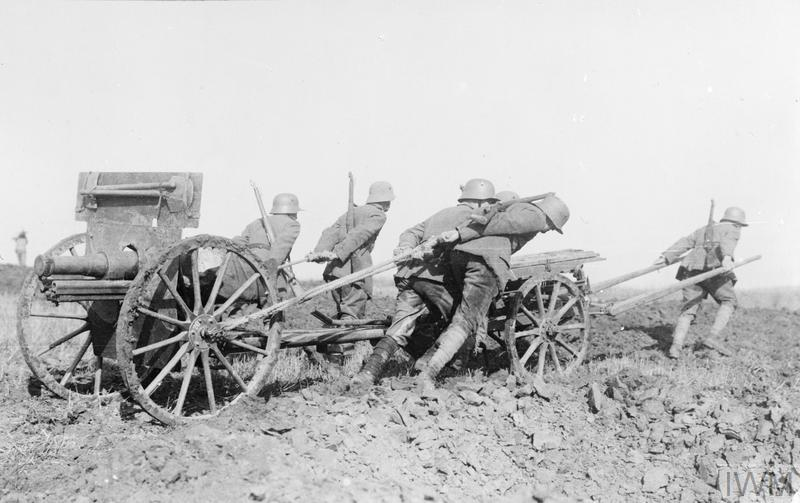
Better known as Passchendaele, the battle stands as one of the most infamous campaigns of the Great War. As at Messines Ridge, the Allies are on the offensive, but their resources are stretched thin - the diversion of British and French strength to Italy weighs heavily on their plans. The objective is clear: seize the ridges east of Ypres and capture the crucial railway station at Passchendaele, the supply artery of the German 4th Army. If successful, the German position in north-west Belgium will be dangerously compromised.
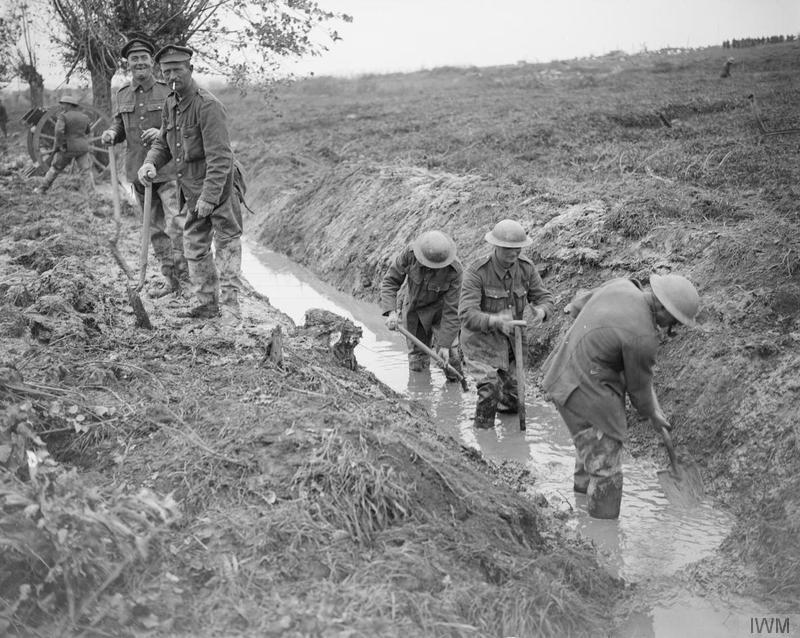
The battlefield itself may become the greatest enemy. Torrential autumn rains are expected to churn the clay soil into a sea of mud. Men, horses, and even tanks will vanish into the morass.
Players will note this scenario runs longer than the First and Second Ypres battles, reflecting the drawn-out struggle for Passchendaele. Here, new technology begins to shape the battlefield: British tanks make their appearance, while the skies fill with more aircraft and new types on both sides.
To stand any chance of success, the Allied player must open with a coordinated British–French assault. The first moves may bring quick gains, but if the rains return the advance will likely bog down, giving the Germans the opportunity to counterattack and steady their lines.
Reinforced with more artillery, the Allies can unleash intensified barrages to grind forward step by step. Yet the German player will not sit idle - reinforcements will arrive, and their new elastic defense tactics give them the edge, enabling powerful counterstrikes by fresh Eingreif divisions.
As the weather worsens again, advances can be expected to slow to a crawl. The Allies face critical decisions: press forward at high cost or consolidate limited gains. The Germans, while under pressure, can bleed the attackers by trading space for time.
Victory conditions are intentionally overambitious, reflecting the flawed optimism of both sides’ historical plans.
This scenario offers the most grueling test yet; filled with foul weather, attrition and command judgment. Players will feel the tension of creeping advances, sudden counter-blows, and the constant drag of the mud. Passchendaele was never just a battle — it was a crucible of endurance and courage. Our game will bring that experience to life.
Fourth Ypres (7 – 29 April 1918)
The Fourth Battle of Ypres, also known as the Battle of the Lys, was the fifth major clash fought around Ypres. As part of the German Spring Offensives of 1918, this attack, Operation Georgette, was designed to break the Allied front and win the war before American reinforcements could arrive in strength.
The German player commands the Fourth and Sixth Armies, equipped with elite stormtrooper formations. These units represent a dramatic shift in German tactics, combining infiltration with massive artillery barrages designed to enable the attackers to bypass strongpoints and penetrate deep into the Allied rear.
Facing them is a fragile but determined Allied defense: the British Second Army, the ANZAC Corps, the French XXXII Corps, and the vulnerable Portuguese Expeditionary Corps (CEP).
The main German assault is setup to be directed against the Portuguese CEP holding the sector around Neuve Chapelle, La Bassée, and Estaires. Historically, the CEP collapsed under this attack, creating a four-mile gap. In-game, this sector represents the most brittle point of the Allied line — if broken, the Germans can surge rapidly westward, overrunning towns and villages in their path.
To the north, the Germans may want to press against Messines Ridge, a key position that has been heavily fortified by the British 19th (Western) and 25th Divisions. Here, players will find tougher resistance, testing whether German stormtrooper tactics can succeed against better-prepared defenders.
The Allied player will need to scramble reinforcements, including French and ANZAC divisions, to plug the gap and hold vital junctions such as Hazebrouck. A timely defense here can blunt the offensive, but this necessary defense will come at a severe cost.
Victory conditions are designed to stretch the Germans to their limits, just as they were historically.
This scenario captures the drama of Operation Georgette: the shock of the stormtrooper breakthrough, the collapse of the Portuguese line, and the desperate Allied defense. It gives players the chance to experiment with new infiltration tactics, manage brittle coalition forces, and fight for control of the vital approaches to Ypres. The Fourth Battle of Ypres is a clash of innovation, desperation, and attrition - a battle where every decision could mean the difference between victory and defeat.
Fifth Ypres (23 September – October 1918)
Known as the Advance in Flanders, the battle began on 28 September 1918 with a thunderous Allied bombardment. Leading the charge under King Albert I of Belgium, Belgian troops, the British Second Army, and the French Sixth Army stormed across the ruined Ypres Salient. Opposite them, the exhausted German Fourth Army, worn down by months of attrition and starved of reserves, staggered under the weight of the attack.
This scenario delivers a new experience at Ypres - momentum. The Allied player must strike fast and never let up. Keep the pressure on, and the German line will shatter, turning the advance from a slog of muddy yards into a sweeping drive measured in miles.
This scenario lets players experience the reversal of the Third Ypres campaign - not a slow grind in mud, but a rapid advance against crumbling defenses. Belgian forces press north toward Dixmude, while British divisions push east toward Roulers, opening the way for a sweeping liberation of Flanders.
This is a battle of flanks and timing. The Allied player must drive forward in unison - Belgian forces striking north, British divisions pressing east - while the German player scrambles to delay their advance. Counterattacks may slow the tide, but if the Allies gain momentum, the German defense will buckle under the pressure.
As the battle wears on, pursuit becomes possible. The German player must sacrifice ground to buy time, while the Allies push hard to exploit every opening. By the close of October, the German line in Flanders is in full retreat — towns and villages are freed, and Ypres is secured at last after four years of relentless struggle.
This time the burden falls on the Allies to capture a wide swath of towns and villages - and they must strike fast. Only by moving with speed and determination can they meet the demanding victory conditions before time runs out.
This scenario captures the unique energy of the final Ypres battle - not a futile struggle in mud, but a bold Allied drive that liberated northwest Belgium and secured Ypres once and for all. Players will relive the reversal of Third Ypres, advancing through weakened defenses instead of slogging into them, with the fate of Flanders hanging on their ability to balance speed, coordination, and endurance.

Summary
We built the Battles for Ypres to be more than a set of scenarios. Our purpose with it is to not just relive these epic battles, but also to demonstrate the war’s progression, from early improvisation to late-war systems; cavalry to tanks; limited air reconnaissance to aircraft with real striking power; from artillery as support to artillery as a coordinated method of attack.
The terrain stays the same. The front line does not.
If you want campaigns where terrain and weather matter, where technology arrives with limits, and where the front line feels like something you have to wear down and break - this is that DLC.


