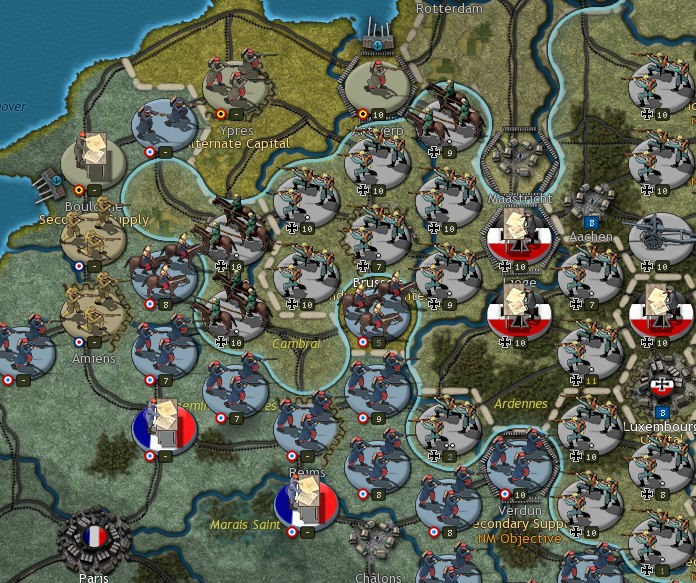
Cavalry and Rapid Advances
 At the outset of war, Cavalry units were instrumental in driving rapid advances through enemy territory and front lines. During the September to October 1914 Race to the Sea, both the British, French and German armies attempted to outflank and envelop each other from the French border up to the channel coast of Belgium, ending the race along the north sea coast around October 19.
Cavalry units were of crucial importance during this race as neither side was decidedly able to gain the advantage, eventually settling into a stalemate on the Western Front after the Germans tried but failed to take Ypres as the year drew to a close.
Cavalry - Race to the Sea
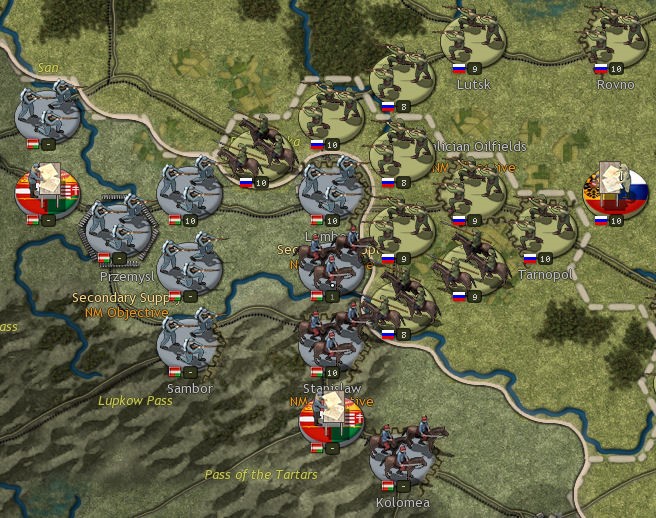
While Cavalry shock tactics quickly fell out of favour on the Western Front, trench lines soon began to form resulting in an overall lack of maneuverability relative to the early months of the war, all major combatants employed their use, and significantly so on the more open Eastern and Middle Eastern fronts.
Russian Cavalry - Eastern Front

Ottoman Cavalry

In order to model the effective military use of Cavalry, as represented in WWI, Cavalry units have been given a greater spotting range than Infantry, so moving a Cavalry unit first may disclose some enemy units, and during their use in mobile warfare, Cavalry units can spot up to 3 hexes whereas other units can only spot 2. This makes them especially useful in either the initial phases of the war, or later on when a breakthrough has been achieved!
Generally, it is recommended to:
-
Use your Cavalry to reconnoitre before advancing deep into enemy territory.
-
Maintain Cavalry units near the front line when launching offensives so that they can exploit any successes and convert them into a breakthrough.
Fortified Lines and Trenches
To help stem the tide of rapid infantry and cavalry advances, all infantry and cavalry units that have neither attacked nor used up all their Action Points can Entrench.
Doing so completes their turn. The Trench can have up to 3 sides, and it is generally best to choose 3 as if the unit is attacked from those sides then it will receive defensive bonuses, whereas if it is attacked from another direction then the only potential benefit of being entrenched will be the defending unit’s Entrenchment Value.
Researching Trench Warfare will also improve your trench’s maximum entrenchment value by 1, which over the course of the war will also be reflected by an improved trench graphic. From single line trenches to double lines, followed by double lines with barbed wire and fortified bunker emplacements.
Western Front - Mid/Late War Trench Lines and Shell Craters

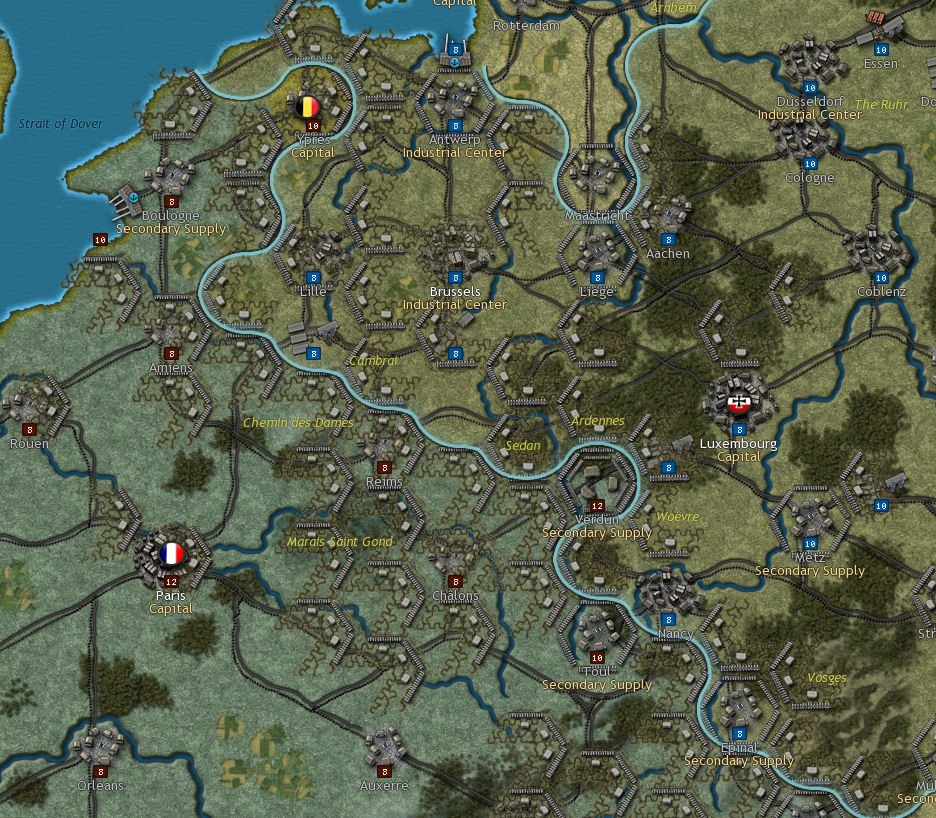
New! - When selecting a unit to entrench, the game engine will take into account any known enemy units within range and pre-select the most optimal facing and number of sides for your trench. This saves a lot of time once the fortified lines start to take shape along the Western Front as seen above.
NEXT: RECON, ARTILLERY AND BREAKTHROUGHS!


