


I did goof, as while culling the unwanted units from the template, I accidentally culled 1.220 PzJg Coy. This is an 11 gun company and would have stiffened the defence of Anthili a touch.
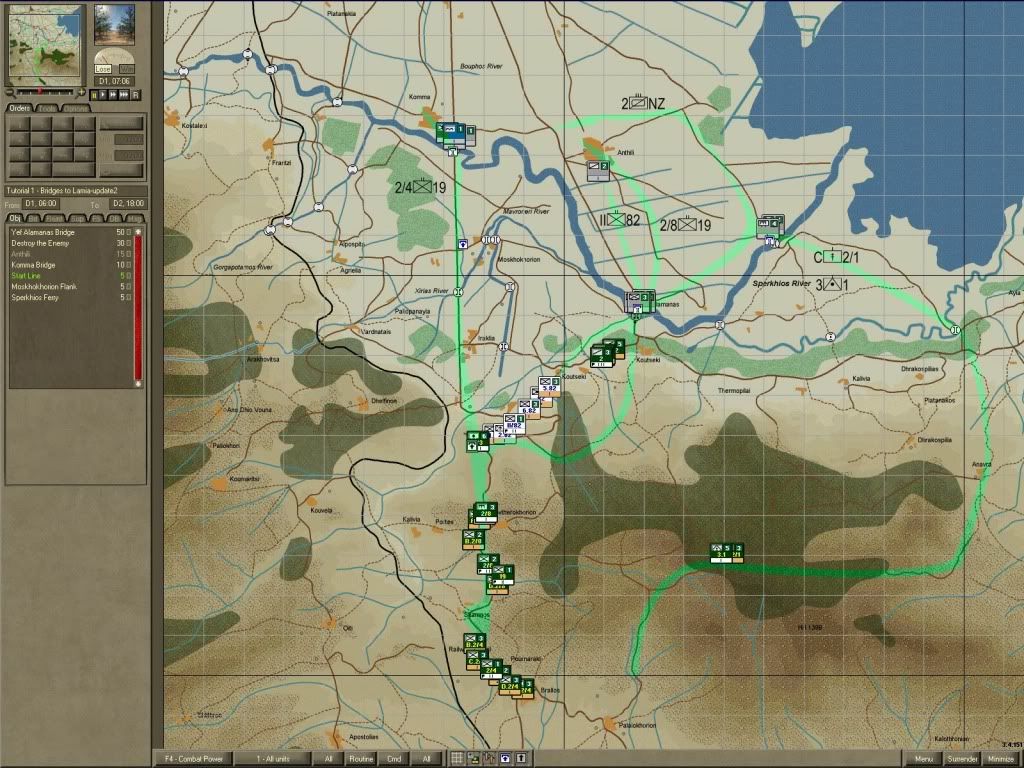
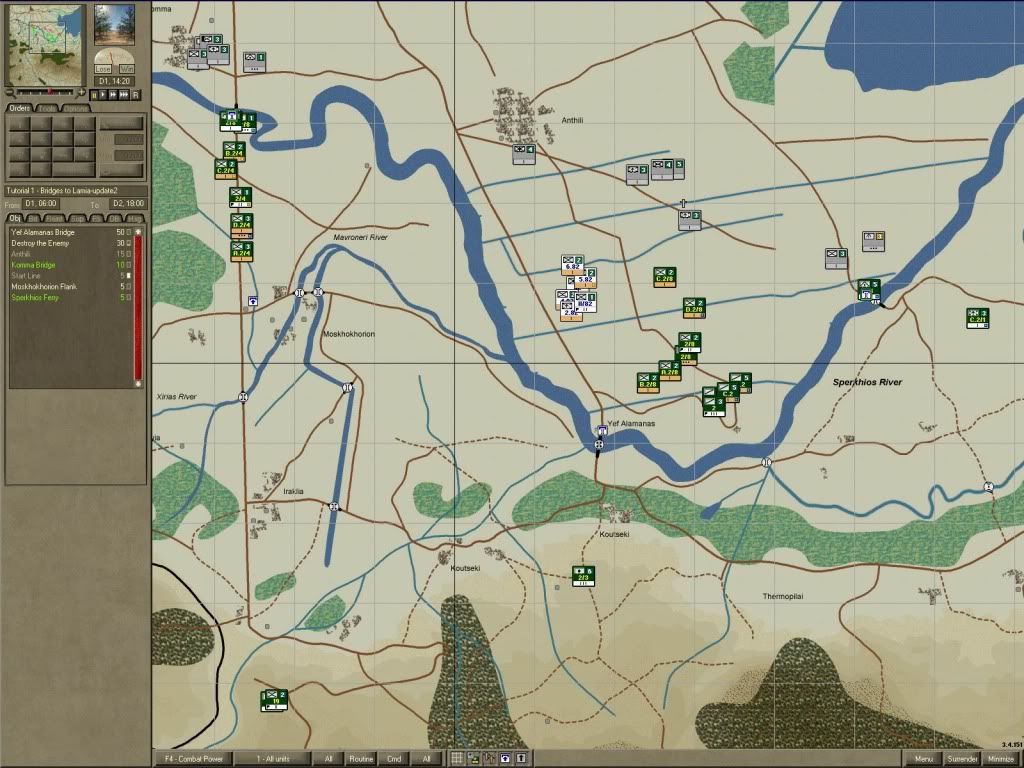
The AI started with II/433 guarding Komma, with one company detached at Anthili, and I/433 guarding Yef Alamanas, with one company and the AT plt at Sperkhios ferry.
The Regt Base is in the far north at Lamia, and the HQ controls the AAA and Inf Gun Platoons at Anthili.
Unusually the AI was quite happy with these arrangements (there is normally a flurry of activity at scn start, but not today).
The basic plan for the 19th Bde is as previously used - in anticipation of slower progress, I plan to swing the Light Armour past Sperkhios to ensure the crossing is cleared, and push 2/82 up the left/centre and 2/8 up the right of the Yef Alamanas push. Both 2/82 and 2/8 to advance in column, deploying as needed to maintain pressure - no developed attacks are planned. 2/4 to push across the river at Komma bridge and occupy Komma village if possible. Failure to accomplish this mission will force them to dig in near the crossing and wait - unhinging his defences on the right should allow further movement to be possible so this is only expected to be a brief delay.
Terrain assessment:
Heavy use of artillery and tank support will allow the use of the main road through Yef Alamanas, it is not intended to get embroiled in a protracted fight at the bridge, or move through the marshes. 2/82 may be routed along the stream to take advantage of the cover offered, with minimal risk of delay.
The road to the south of the main ridge will support movement of the motorised support troops who will demonstrate near the Sperkhios crossing - they will take up position either on the ridge to the south of the Sperkhios, or on one of the minor ridges within the Sperkhios bend.
The road to Komma is the most exposed, and it is vital that the defences are suppressed using artillery during the approach march to avoid the bridge being dropped.
Plan:
2 NZ Div Cav Regt. Advance via road to Yef Alamanas, defeat defenders using attack by fire from the march, prevent troops from rallying within the Yef Alamanas area. On completion of the attack by fire mission, cross at Yef Alamanas and continue via the road north of Sperkhios Ferry and pass East and North of Anthili - it is anticipated that they will assist isolating Anthili from reinforcements from the north.
II/82 (Greek). Advance along the stream to Yef Alamanas, pass across bridge and advance between two left hand roads to Anthili - attempt to enter Anthili from the march. If defence proves stronger than is manageable dig in and await support or dusk.
2/8. Advance via road through tip of wooded area, passing through Koutseki (East) and Yef Alamanas. Advance to the right of II/82 near right hand 'Anthili' road. Occupy Anthili from the march and hold.
2/4. Advance through Moskhokhorion and Komma bridge, occupy and hold Komma from the march.
C.2/1 MG Advance via Anavra to Sperkhios crossing. Occupy ridge to north of crossing if uncontested. Deploy and dig in (fire command) once the crossing guards are within sight if crossing impractical. Support by fire.
3.1AT Advance via Anavra to Sperkhios crossing.
2/8 Fd, 2/8 Fd Bridging Plt. Advance at full rate along main Yef Alamanas Road. Secure crossing. Prepare to re-deploy to secure Komma crossing once Yef Alamanas occupied by II/82 or 2/8 march columns.
19 Bde HQ. Occupy Start-line. Observe progress, occupy Yef Alamanas on passage of 2/8, II/82 and 2 NZ.
2/3 Fd RAA. Occupy Start-line. Perform 90-120 minute preparation on Yef Alamanas in low rate. During final approach by 2/8 Fd RAE fire a short duration (10-15 minutes) at full ROF. The same plan is to be used for the support by fire at Komma - the duration of fire to be 120-150 minutes as there is no armour support. It is unlikely there will be much ammunition or opportunity for fires on other targets, but priority for air and artillery to suppression of mortars/guns.
19 Bde Base. Once Yef Alamanas is secure occupy southern bank at Koutseki.
Conduct of Operation:
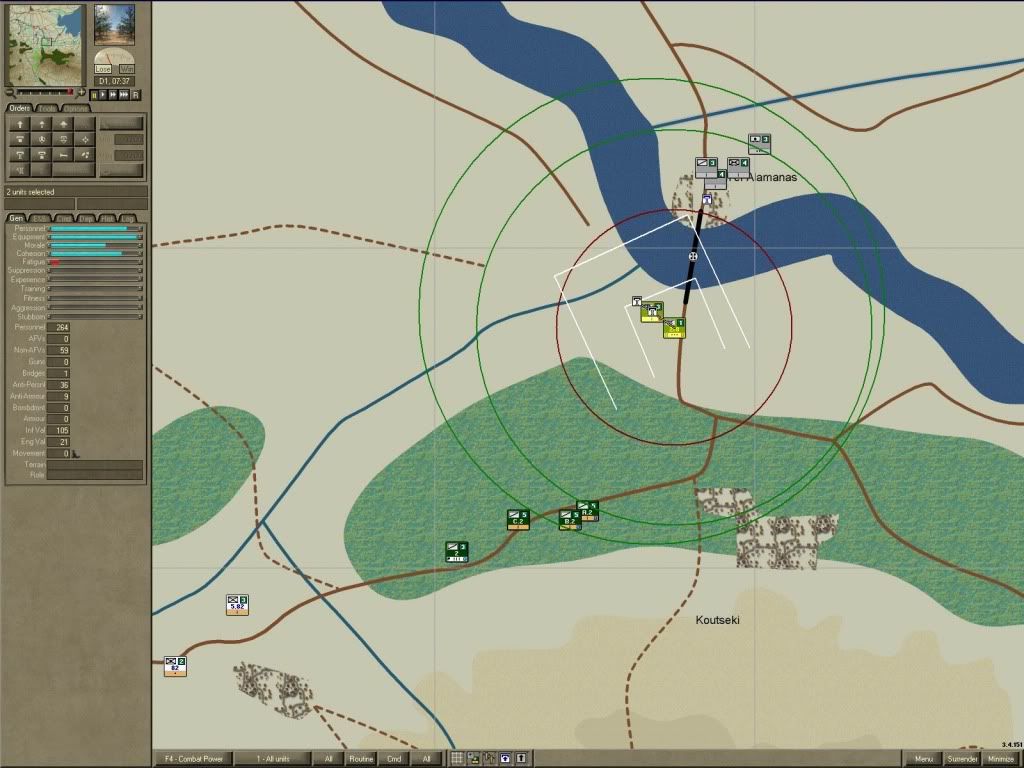
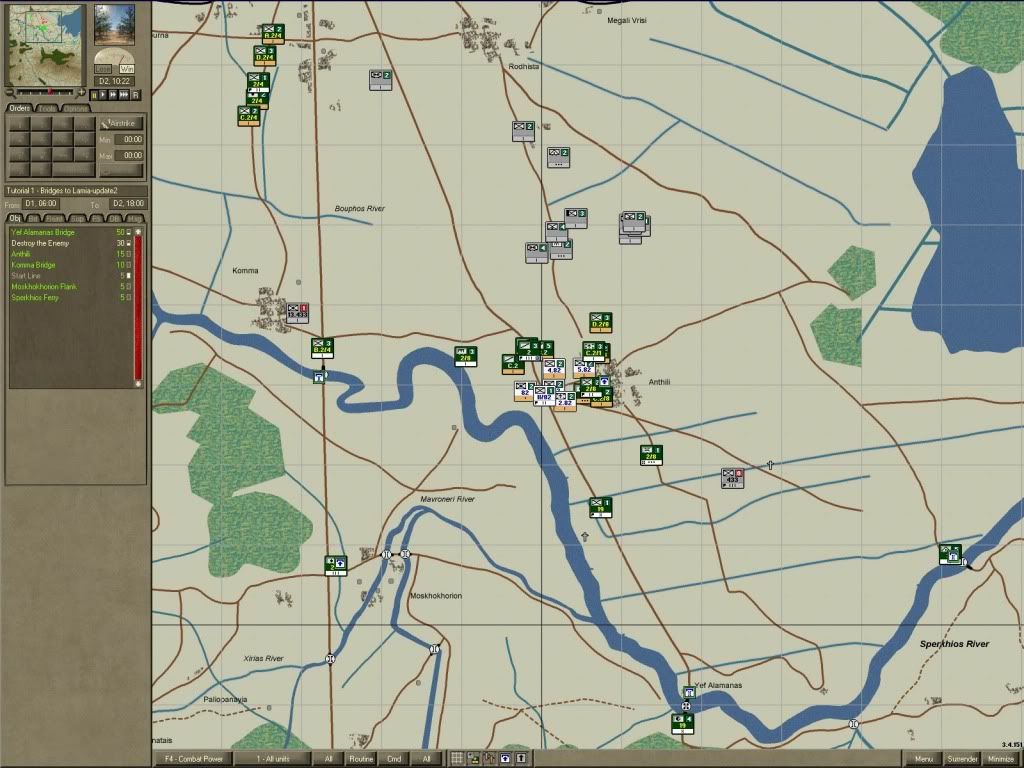
2NZ engages German units at bridge. By 07:06 the artillery is emplaced at the start line with direct LOS to the village of Yef Alamanas. A planned 90 minute barrage against the defenders is started, intensifying at 07:25 to cover the rapid approach of the engineer columns.
By 07:37 the barrage has suppressed the defenders sufficiently to allow the engineer columns to secure the bridge from demolition. They deploy by the banks and begin to dig in. The tanks work in closer in alternate min/max aggression.
Over the course of the next few hours the barrage is maintained at low rate, and in conjunction with the fires from 2NZ (by now on the bridge itself), 2/8 Fd RAE and II/82 the defenders waver. The continuing and heavy fire breaks any unit that displaces, and prevents rallying within nearly 3km of the bridge - these troops never manage to form a credible threat to the bridgehead. By 10:30 the Greek infantry is within the village and beginning to deploy north, and only the I Bn HQ is still present in Yef Alamanas, two companies of line infantry, the pioneers and the Mortar platoon have routed and lost around 30% strength including 5 of 6 mortars. Friendly casualties are extremely light - less than 5 men from the engineer company.
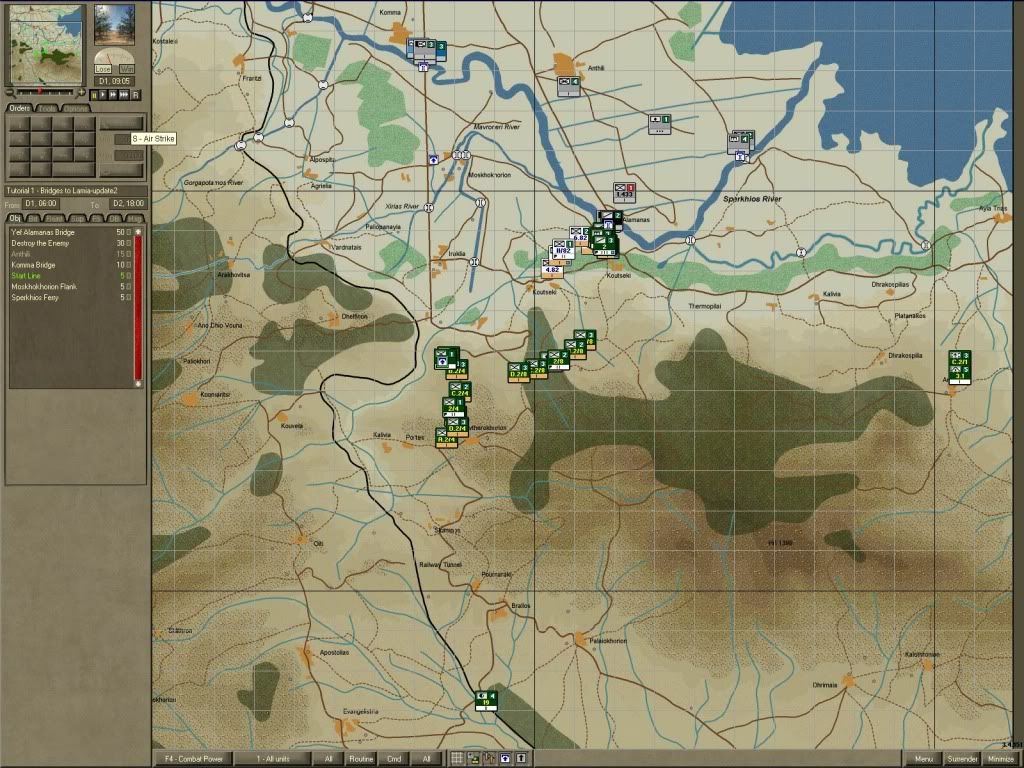
With the breaking of the Yef Alamanas position, the engineers are re-tasked to secure the Komma crossing and prepare to move out. C2/1 MG is just approaching an overwatch position for the Sperkhios crossing, and soon becomes embroiled in a firefight with the infantry company and AT platoon on the far bank.
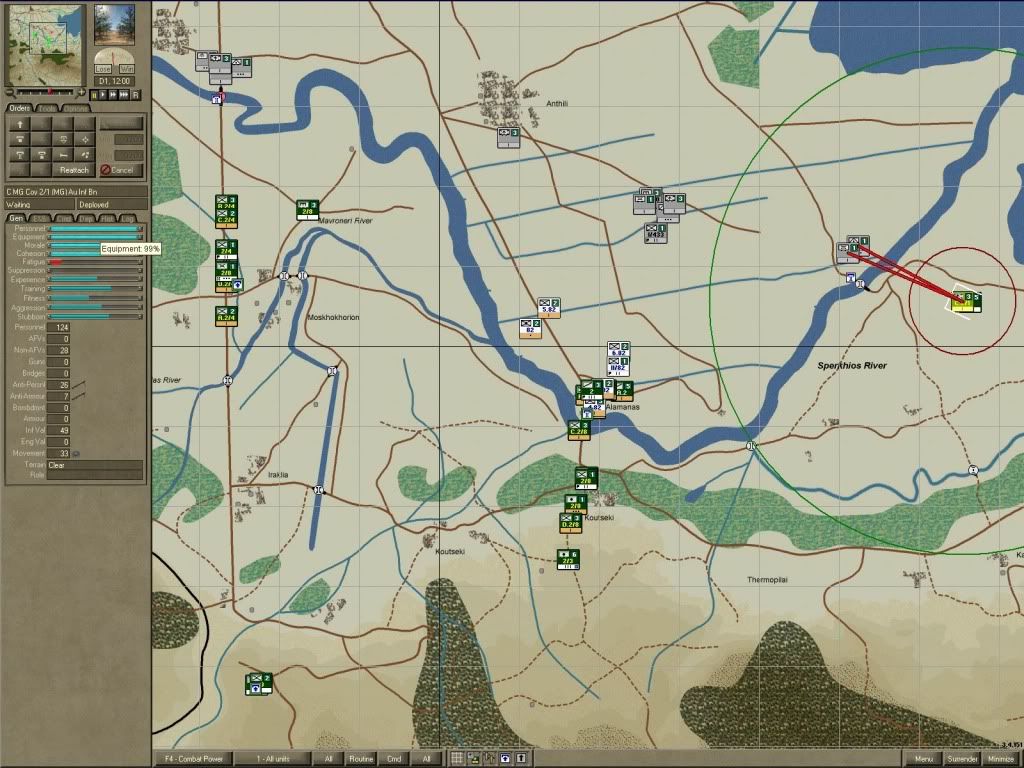
Midday sees the advancing 2/4 Bn coming under fire from the Komma defenders. The fire is only modestly effective, but deploying to return fire sets the advance back a couple of hours. Fortunately the artillery barrage that has been wearing down the Komma defences for the previous 2 hours reduces the effectiveness of the defensive fire, and the engineers succeed in securing this crossing by 12:30, although the 2/4 Bn finds the lead companies dispersed by mortar fire from the crossing guards.
At Sperkhios, the AT platoon is cautiously pressing forwards under cover from the C2/1 MG coy, which forces the defending AT platoon to move forward into dead-ground.
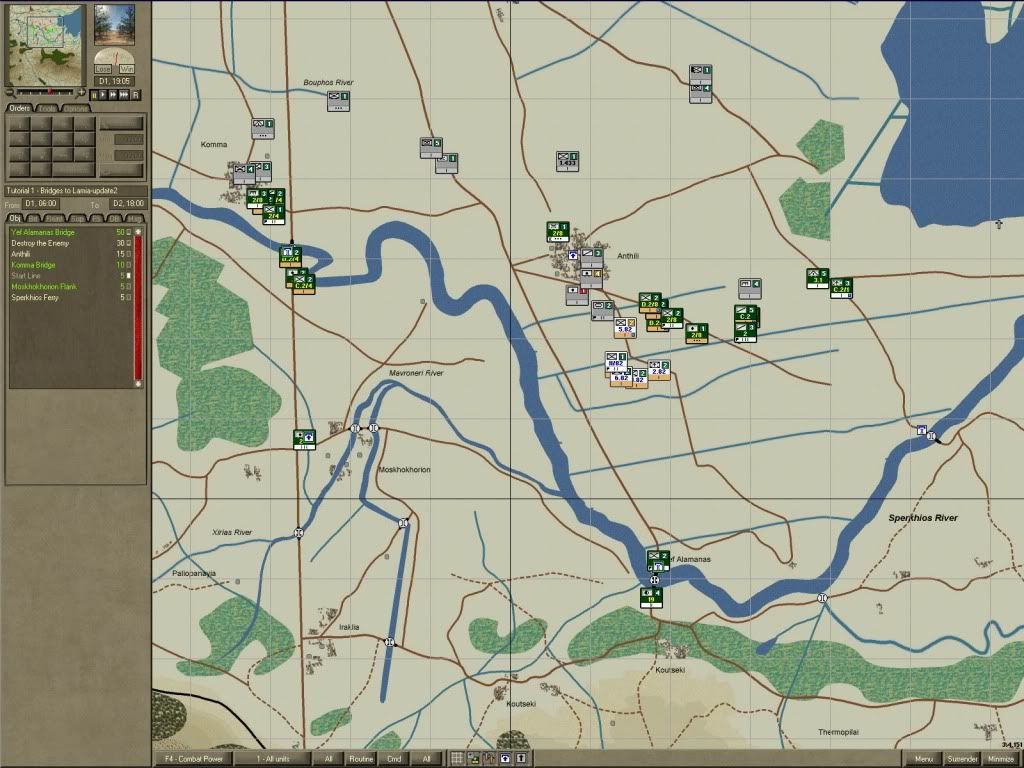
The advance in the centre is proceeding well, with II/82 moving north, 2NZ clear of the crossing and heading towards the flank of the Sperkhios position and 2/8 completing the passage of the bridge. The Yef Almanas defenders have regrouped in the open about half-way between Anthili and Sperkhios, but will be bypassed by the advancing battalions - I expect them to be too brittle to be much threat for now.
All advances continue through the afternoon, Sperkhios is forced by the combination of MG company support fires and the advance of the AT battery - the Mortar platoon from Yef Almanas surrenders under fire from 2/8 Bn and 2/4 close up on the Komma crossing, forcing the defenders back beyond the cross road. II/82 is temporarily stalled by fire from the I.433 Bn survivors, as it cannot effectively return fire, but this is soon remedied by the continuing advance of 2/8.
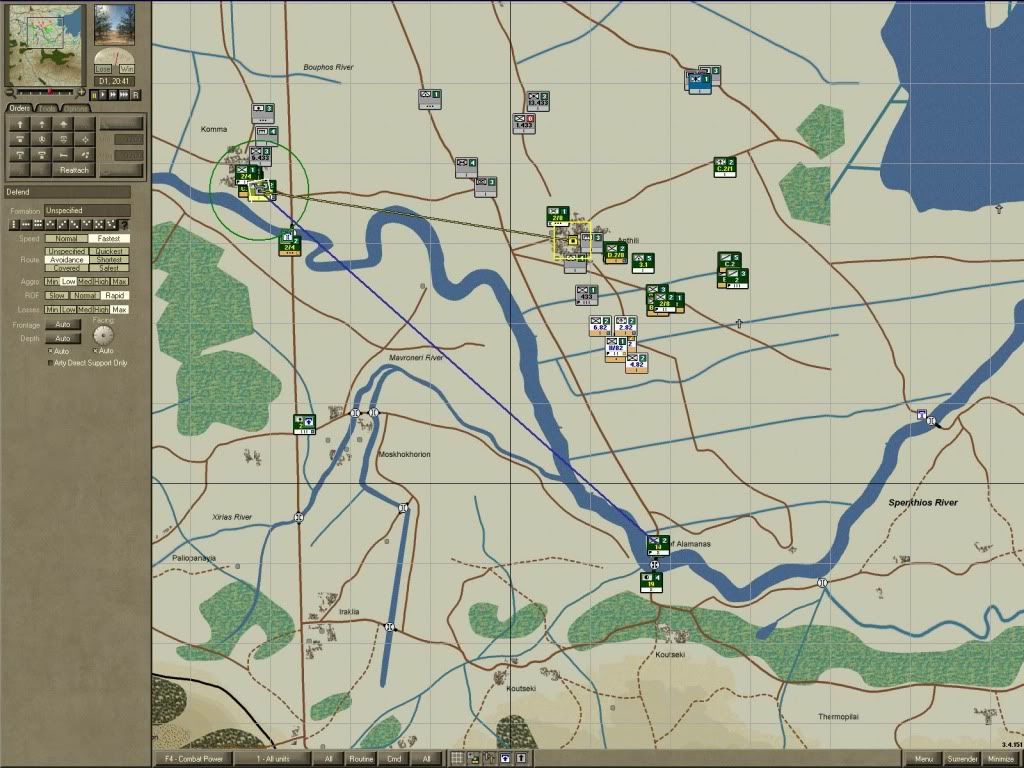
By late afternoon, the defences of Anthili are becoming evident - there are at least two batteries of guns here, and they stop II/82 cold. The Greeks take cover and return fire as best they can - only the Mtn Gun and MG companies have range to do very much, and the infantry doesn't seem happy about it. Fortunately the 2/8 Bn is still making good progress and pressure from them, the motorised guns and the NZ light armour forces I.433 north of Anthili to regroup, in the process 3/1AT and C2/1MG overrrun and destroy the I.433 PzJg Pl.
An impromptu attempt to seize the southern portion of Komma village by 2/8Fd is beaten off by a fresh infantry company that had been previously unaffected by the barrage. I eventually abandon this attempt and turn it towards Anthili, but a few more casualties are caused here for little gain. A much riskier gambit sees 2/8 (bridging pl) slipping behind the Anthili defenders before the I.433 Bn survivors can be rallied and return to bolster the defence. They take position in the northern tip of Anthili and dig in to the original positions left by the Germans.
The resumed advance by II/82 fails immediately as they run into a heavy concentration of automatic fire from the SMG of 433 Regt HQ, this unit is tough and holds up the advance of the entire battalion for several hours, eventually being outflanked and unsupported by any near unit it is forced to give ground, but the Greeks aren't equal to close combat with this unit and suffer many of their 20 casualties fighting south of Anthili.
By late evening, it is evident that a major counter-attack is being planned at Anthili - the defenders of Komma begin to move North, and are harassed by 2/4 as it occupies the town. The I.433 group is also beginning to filter south, and indirect fires from the 25pdrs of 2/3Fd are instrumental in keeping it isolated. One unit that gets too close to the 2/8 Pl is driven off by small-arms fire, but most don't approach very closely before the arrival of 2NZ into blocking positions north of Anthili during the night. C2/1MG and 2/8Bn begin to exert pressure on the infantry garrison of Anthili, but an error in routeing leaves 3/1AT exposed and pinned down within SMG range of this unit - a gun is lost and most of this unit's 15 casualties are incurred as a result of a 'wrong turn'. Eventually sustained (90 minutes rapid) fire from the MG company to the North East, direct pressure from 2/8 to the south and the presence of the newly arrived 2/8Fd company in the centre of Anthili breaks the unit, 2.I/433 and by morning the town is securely held.
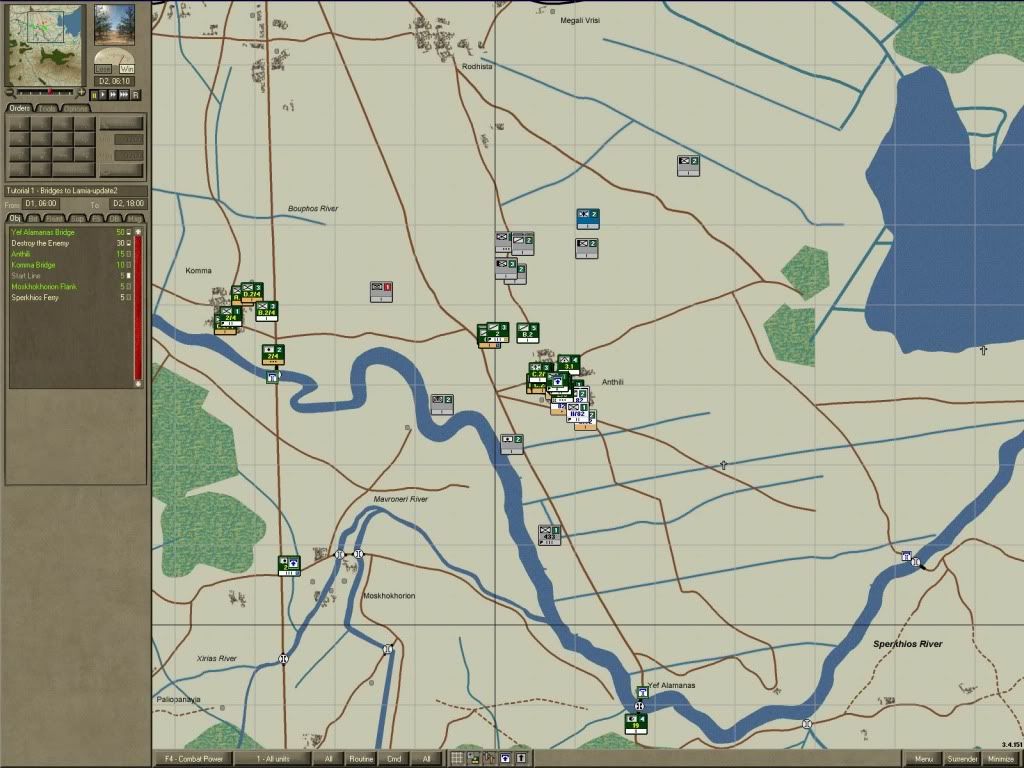
Along the Sperkhios banks at dawn we find the broken remnants of 2.I/433, 1.54 Flak, 433 Regt HQ, and 13.433 infantry gun companies. Anthili is held by II/82, 2/8, 3/1AT, C2/1MG, 2/8Fd (company and bridge) and 19 Bde HQ, 2NZ is screening to the North, preventing the reinforcement or attack by most of I.433 and II.433 Bn.
2.I/433 evades north towards Lamia, and is left to run while attention is turned to the elimination of the support elements, and the containment of the bulk of his remaining infantry.
13.433 evades to the West, passing north of the defending B2/4 at Komma bridge, 2/8Fd company is dispatched to hunt down these guns, and catch and destroy them just west of Komma during the morning.
1.54 and 433 Regt HQ both badly shaken and isolated, go to ground along the river bank between Yef Alamanas and Anthili, and surrender soon after they are cornered by 19 Bde HQ and 2/8Fd Pl.
The 2/4 Bn moves north from Komma, and entering Lamia eliminates the 433 Regimental supply column just after 13:00.
2NZ moves north along the Anthili-Lamia road, and plans to turn East before Rodhista to assist crushing the infantry located around the mid point of the Anthili-Rodhista road.
II/82 is tasked to push up the Anthili-Rodhista road, but finds it tough operating in the open with only short ranged and light weapons in the face of MG34s - there are no more casualties, but they make poor progress.
2/8 Bn heads north from Anthili to cross the ditch at the road. This unit makes much better progress, and supports the advance of the Greeks to their left flank.
C2/1 MG pushes forwards to the ditch ending near Megali Vrisi and digs in in an attack by fire position. The presence of this unit destroys any hope of holding a firm line, and is instrumental in breaking the resolve of the remaining units in the last hours.
Finally 2/8Fd company and 2/4 Bn are sent to join 2NZ and block the northern exit from the newly forming pocket.
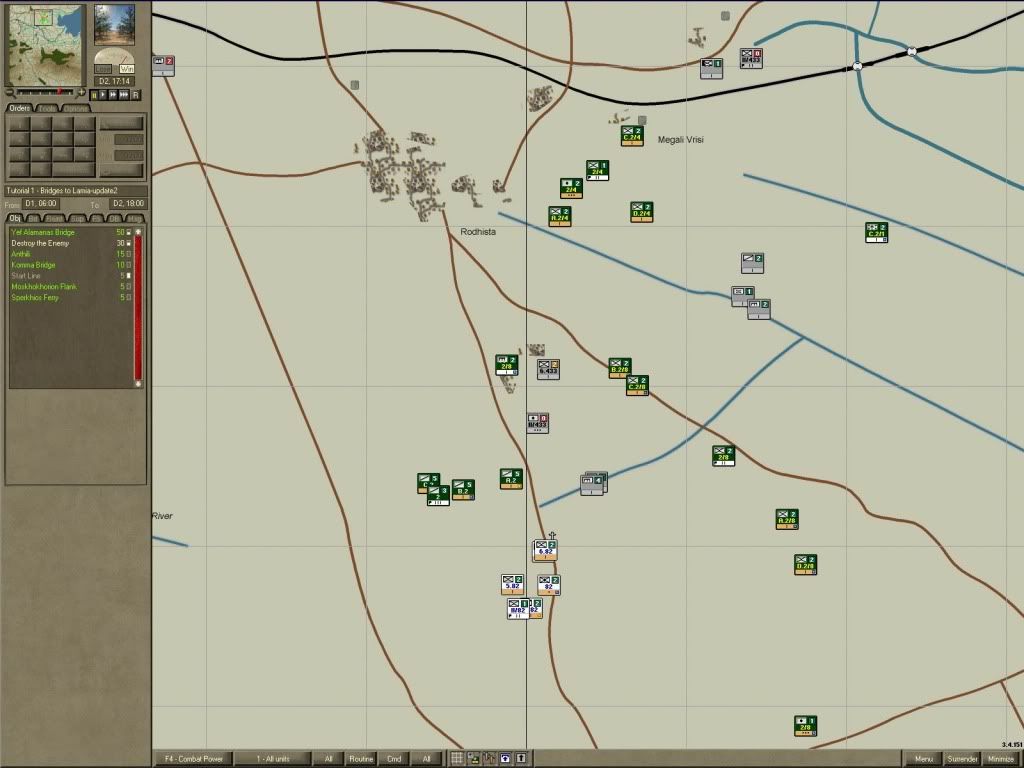
The 8.II/433 PzJg Pl is destroyed by fire, and by 17:15 the entire group is routing, in rout recovery and has very brittle morale.
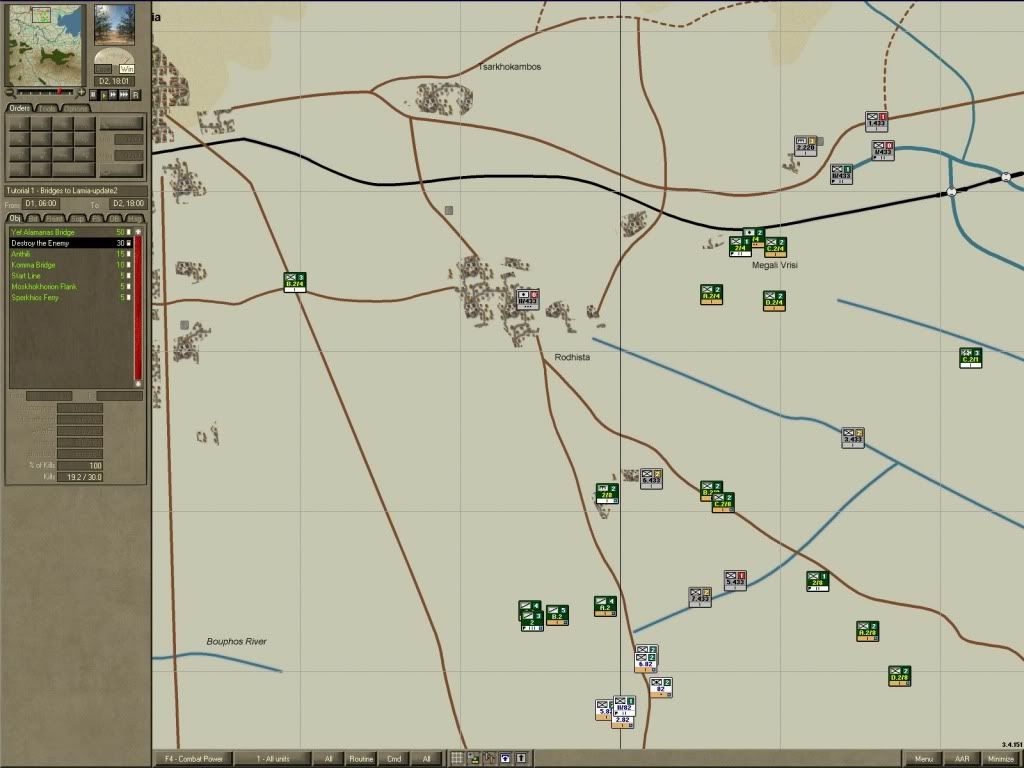
By 18:00 the German force is impotent, and total destruction is only hours away.
(I can't re-examine the original D2 18:01 save, as many (6 of 10) of the German units are missing when it is reloaded - so this is a second (slightly less successful) run through from D2 17:14)
AAR:
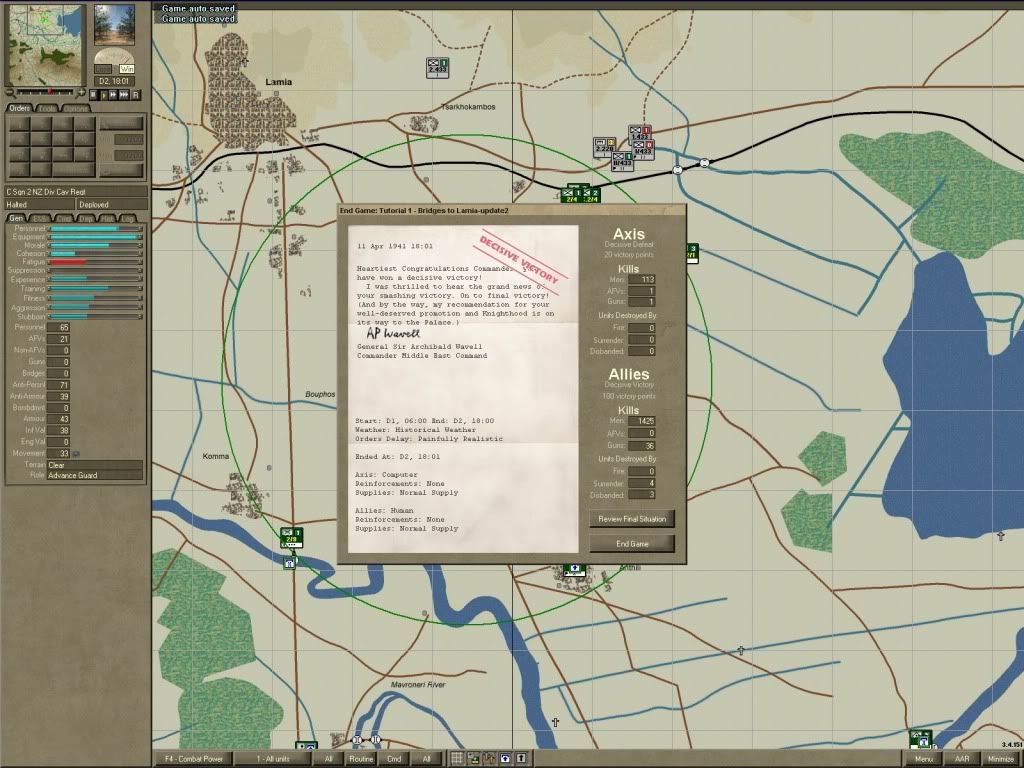
No allied unit disbanded, 113 casualties (mostly in 2/8 Fd, 3/1AT and II/82 Bn), with one Vickers MkVI lost from 2NZ and one 2pdr gun from 3/1AT.
7 German units disbanded/surrendered, 1425 MIA/WIA/KIA, and 36 or 37 guns including all but one 8cm mortar and all other guns.
The starting gun strength was 38 of all types, total 'selected' end strength is 1 which agrees to the E&S totals, but losses only show 36?