


Orders delay on painfully realistic, options are straight (no Axis tank company, but I'll probably run with this on for a future 'project').
Mostly the original orders followed throughout, but a minor re-plan during the evening/night of day 1 and adjustment of movement routes during the exploitation from Sperkhios and pursuit of the routed survivors during the morning of day 2.
Mission:
Force the river crossings on the approaches to Lamia. Eliminate organised resistance in the AO.
Friendly Forces (order groups):
Elements of 19th Australian Bde.
HQ 19th Bde
Supply Echelon 19 Bde (mot)
2nd/3rd FD Rgt RAA (25pdr guns) (mot)
2/4 Au Inf Bn
2/8 Au Inf Bn
2/82 Gk Inf Bn
2 NZ Cav Rgt (Dingo/MkVI) (mot/mixed arm'd)
3/1 AT Bty (12 2pdr AT) (mot)
C coy 2/1 Au MG Bn (mot)
2/8 Fd Coy RAE (engineers) (mot)
Bridging Plt 2/8 Fd Coy RAE (Engineers) (mot)
Enemy Forces:
Reinforced Inf Bn
I Bn Inf Rgt 433 HQ
1 coy Inf Rgt 433
2 coy Inf Rgt 433
3 coy Inf Rgt 433
PzJg Plt I Bn Inf Rgt 433 (mot)
Mor Plt I Bn Inf Rgt 433
(attached):
6 coy Inf Rgt 433
7 coy Inf Rgt 433
13 Inf Gun coy Inf Rgt 433
2 Coy Pnr Bn 220
1 Coy PzJg Bn 220 (mot)
1 Bty Flak Bn 54 (mot)
Terrain:
In the south there is a high ridge, the direct approach is wooded and rough, with poor going except on main roads.
The approaches to the bridges are low lying, with limited cover, but some low relief complicates LOS, and prevents the concentration of fires from a moving column. Marshy ground on the approaches to Yef Alamanas bridge will hinder rapid advance in tactical formations - a choice between movement and security will be required.
The river is unfordable, and the three crossings will need to be secured to allow passage of friendly forces. Yef Alamanas (on the MSR) and Komma (on the left flank) may be wired for demolition. The right flank is approached by either an exposed road along the Sperkhios River, in plain sight of enemy forces, or via a long detour to the South East across rough ground. A good road exists for most, but not all of this route.
Beyond the Sperkhios, the ground is low-lying, but not flat, with limited intervisibilites between the centre and right approaches, and multiple drainage ditches provide cover and will delay cross country movements.
The roads from Yef Alamanas all converge on the area of the town of Anthili (although one route does pass to the west of this town, it is easily covered by fire, and should be considered impassible without securing the western and southern part of the town.
The left flank route passes near the town of Komma, and is a possible direct route to Lamia. However, the bridge is much less substantial than that on the MSR at Yef Alamanas. A road runs east via Anthili to join with the route north from the Sperkhios Ferry crossing on the right flank - this crossing is also low capacity, but does bypass the town of Anthili.
Initial plan:
C 2/1 MG and 3/1 AT to take south eastern route to approach Sperkhios Ferry. They are to deploy early and minimise exposure until the defences are identified and cleared. (Routeing changed from normal/quickest to normal/covered once through the marshes - move order in effect, with max Aggro, max ROF and max Losses).
2/4 Inf Bn to move via Komma bridge, Komma town and pass to north of Anthili. (Routeing normal/unspecified - move in effect, with max Aggro, max ROF and max Losses).
2/82 Gk Inf Bn to move via Yef Alamanas, east along first drainage ditch north of river and then head north passing through the 'hanging end' of the East-most road originating from Anthili, and East of the last drainage ditch before Anthili town before turning West. Route terminates in Anthili, but replan is likely once progress is observed. (Routeing normal/unspecified (changing to quickest once Yef Alamanas is forced, and shortest or covered once clear of crossing) - move order in effect, medium Aggro, max ROF and max Losses).
2/8 Inf Bn to move via Yef Alamanas, north along middle road from Anthili and passing through Anthili to Komma via the termination of Bouphos River. (Routeing normal/quickest (changing shortest or covered once clear of crossing arrowhead formation once contact made on far side of river) - move order in effect, medium Aggro, max ROF and max Losses).
2/3 Fd Rgt RAA to advance to 'Start-line' positions abandoned by 2/82 Gk. (First fire mission from new position is at max ROF aimed at defenders of Yef Almanas. Subsequently fire on any observed moving formations, and otherwise fire 30 minute or 1 hour barrages at low ROF on the Yef Alamanas position. Switch fires to Komma for similar barrage once 2/4 Inf approaches. Counter battery is top priority - this includes towed AT/Inf Guns as well as Mortar units. Opportunity shoots on large concentrations of moving troops is also a high priority.)
2/8 Fd RAE to advance to Yef Alamanas and secure bridge. (Routeing fastest/quickest along MSR to covered positions near stream to west of Yef Alamanas. Secure in effect with med Aggro, high ROF and high Losses - once YA is secured re-route to secure Komma Bridge with same settings).
19 Bde HQ to advance to 'Start-line' near positions of 2/3 Fd Rgt, move is norm/quickest, but uses alternative route to clear MSR for troop movements.
19 Bde Supply Echelon to remain in place until called forward, with the capture of YA bridge and the securing of a safe perimeter.
and last, but definitely not least:
2 NZ Cav Rgt to secure Yef Alamanas bridge, support by fire as Inf Bn pass across, and then advance rapidly on the left route to Anthili. (Routeing normal/quickest. Move in effect with high Aggro, high ROF and high Losses - once YA is secure and defenders have been driven off, this will be changed to low Aggro unless brought under fire from elements in Anthili or the more eastern routes - the support by fire provided by armour on the defenders' flank should aid the advance of 2/8 inf.)
Conduct of Operation:
Initial contact with the defenders at Yef Alamanas made by 2 NZ Cav shortly after passing through Koutseki (west). Shortly after the newly emplaced 2/3 Fd took the defender's under fire at around 06:30
Little progress was made over the next hour, but the arrival of 2/8 Fd coy coincided with the lifting of the first 'low rate' barrage, and a short 'stonk' was ordered as the 2/8 Fd coy approached Koutseki (east) and the 2 NZ cav switched to low Aggro to displace forward along the road. The Mortar platoon was identified and forced to retreat by combined fire from the armour and artillery. The bridge was secured at 07:37, and the engineers began organising their displacement to the rear to join 2/4 inf in their approach to Komma.
The arrival of 2/8 inf and 2/82 inf on the approaches to Yef Alamanas in support of 2 NZ cav broke the defenders at Yef Alamanas, who proceeded to fall back under pressure towards the rise in the middle of the coastal plain at around 11:45
The MG and AT team fell on Sperkhios ferry at around 10:45, just after the defending AT platoon began moving to block the southern approaches to Anthili to the Cav Rgt, so they only had to push-in a single infantry coy. The MG deployed on a ridge-line overlooking the eastern routes and began to take 3.I.433 and other elements under direct fire. The AT company successfully forced the crossing and deployed within small-arms range of the now broken company. Unfortunately, the MG company became occupied by moving troops further back, and the AT company was thrown back by the bridge defenders, with the loss of one gun.
The combined pressure from the two motorised support companies, and the renewed fighting as 2/8 and 2/82 contacted the German defence lines on the fourth drainage ditch finally broke 3.I.433 and they didn't really achieve anything else of note, remaining pinned by C2/1 MG to the north west of Sperkhios ferry until dusk. 3/1 AT advanced to the east of the German line and deployed near the Sperkhios road near the marshes. They were taken under fire briefly, but pressure from the south forced the Germans to concentrate their firepower on slowing 2/82 Gk Inf Bn.
During the early afternoon, the Komma bridge defences were taken under rapid fire from the 2/3 Fd Rgt, 2/4 Inf began to deploy over the ridgeline into direct fire range, and the 2/8 Fd coy and bridge plt 2/8 Fd coy rushed to secure the crossing. This coincided with the apparent movement of two of these companies to support the defence of Anthili and/or Sperkhios and within an hour the bridge was secured, 2/8 Fd coy was deployed in defensive positions north of the river and 2/4 inf was reforming their march column to sweep through Komma and along the Bouphos to cut off the routes north from Anthili.
At this point, I brought 2/3 Fd Rgt forward to the Moskhokhorion Flank position, giving up their direct observation for reduced range to the main targets near Anthili, and support to the northern limits of the potential advance.
As the afternoon advanced, the progress made by 2/8 Inf and 2/82 Inf began to slow, as the Anthili defenders joined the counter-attack to the south. This led to the shifting of the route of advance of 2/82 somewhat to the East to bypass the defenders and force them back on Anthili.
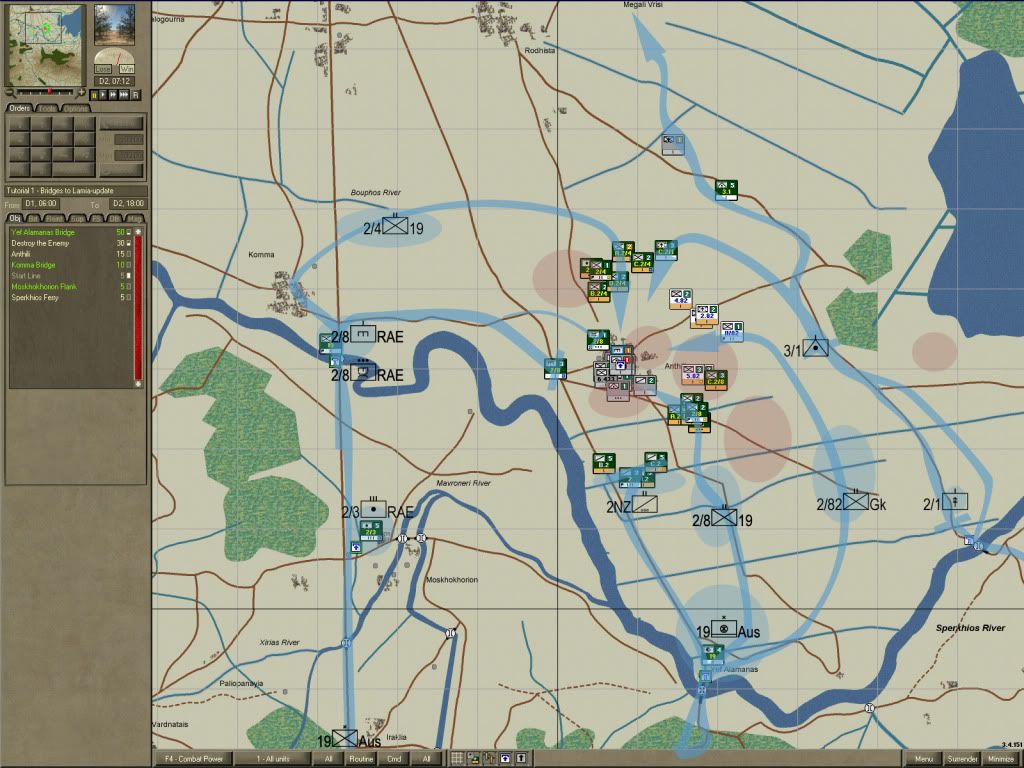
(Dusk intelligence estimates for unit footprints and friendly positions and routes, superimposed on 'actual positions' at dawn)
As night fell, the 3.I.433 from Sperkhios was seen evading to the east of the marshes, and the Komma defenders were retreating on Anthili. 2 NZ cav had been taken under fire from the southern outskirts of Anthili, so I halted them in place, abandoning the advance 1km south of the town along the penultimate ditch. They took up defensive positions on a 1km frontage facing north and hunkered down for the night. To their immediate east, I also halted the advance of 2/8 inf, setting their frontage to 1.5km and orienting NWN. The Greeks had lost contact with the elements reported to their north, and continued to advance - they were then ordered to deploy on a 2km frontage, facing west from the road south to the junction with 2/8 inf.
2/4 inf had closed the western road north from Anthili, and I ordered 2/8 Fd and bridging platoon 2/8 Fd RAE to block the Komma road and close the gap to 2/4 inf. To secure Komma bridge, I ordered 19 Bde HQ to dig in between the bridge, Komma town and the cross-roads. 2/4 Inf was tasked with forming a blocking force and then moving down through Anthili on a broad front, but took all of the night even to get into position. The few contact reports that were 'old' turned out to be no longer valid, the units in question (including the 3 Komma defence companies) being lost in the night. C2/1 MG moved along the road and joined the northern flank of 2/82 Gk Inf.
The night was reasonably uneventful, with 2 NZ cav and artillery driving off three attacks by 6.II.433 and two by 1 Mot PzJg Bn 220 for the loss of the HQ jeep.
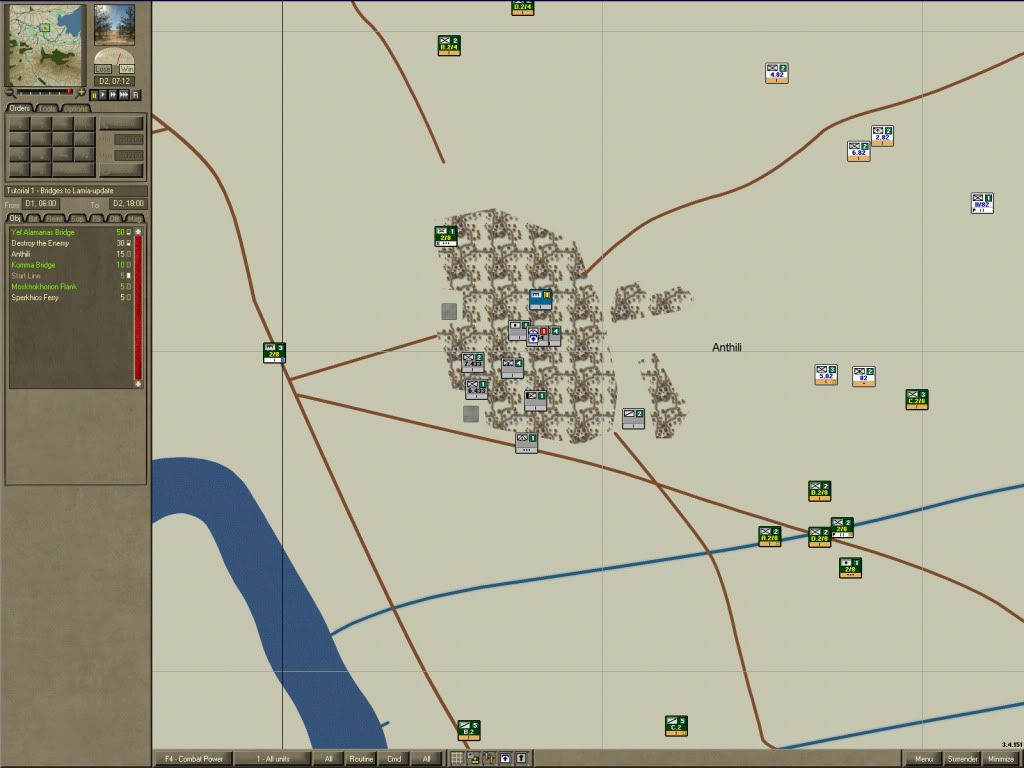
(What the initial state of the defences of Anthili looked like at 07:00 on day 2 - around 950 men and 15 guns left in this concentration).
With the coming of dawn, the situation became clear - the 3.I.433 Sperkhios garrison was deployed on the road north to Megali Vrisi, but the remainder of the German force had been pocketed within Anthili, and the Allied perimeter, while not watertight, was good, except for the North West, where the delayed 2/4 inf had not closed sufficiently on 2/8 Fd coy.
The newly alerted defenders immediately took 2/82 Gk Inf under fire, destroying one of the mountain guns, but not causing enough damage to open a usable gap. The right (northern) flank also came under fire from 3.I.433, but this was rapidly silenced by C2/1 MG and the artillery, and was then pursued out the area in which it could influence the decision by the motorised AT company.
The weak western flank was shortened by pushing the bridging platoon 2/8 Fd into the north-western tip of Anthili and attacks were launched by 2/8, 2/4 and 2/82 infantry, supported by continuous fires by 2/3 Fd Rgt RAA, C2/1 MG and 2 NZ cav. Although the engineers were hard pressed, the combined firepower of the brigade forced 10 of the units trapped to disband or surrender, and only 80 men from 2.220 pioneers escaped from the town. Anthili had been secured by 10:00, with the last trapped units surrendering before 11:00.
The mobile forces maintained pressure on 3.I.433 evading into the hills north of Megali Vrisi and 2.220 evading north west beyond Kaliva. The AT battery received the surrender of their group at 12:27 and the last few stragglers of 2.220 were hunted down during the afternoon.
End Result:
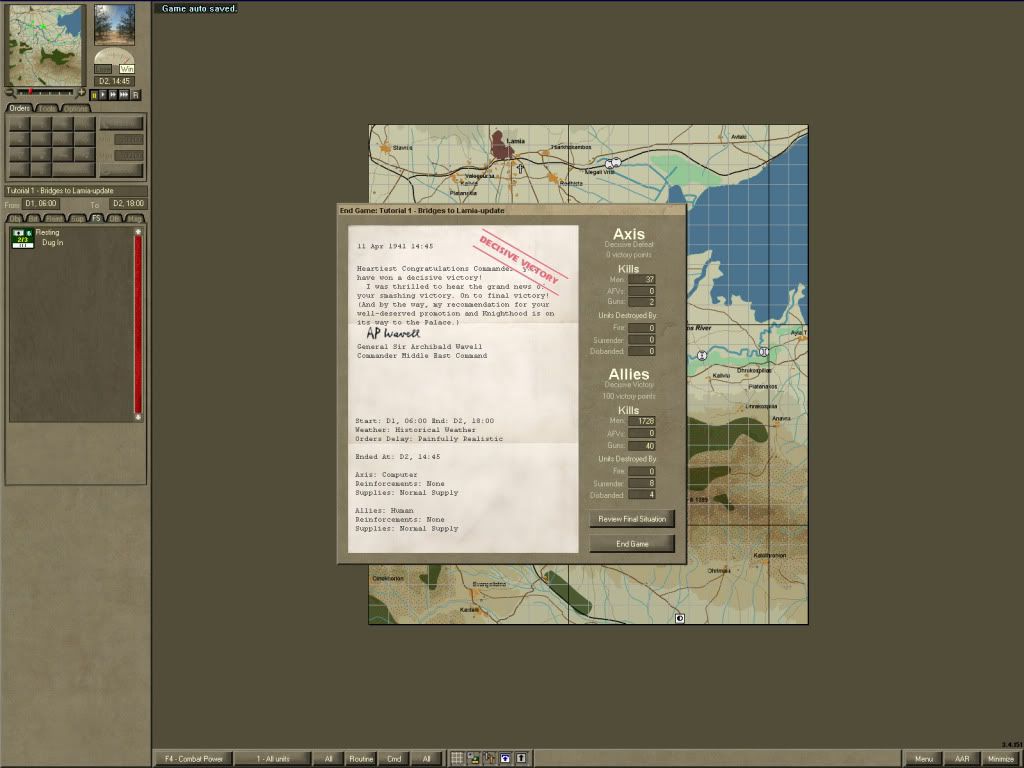
The Germans lost all 1728 men, and 40 assorted guns. The assaulting allies lost 37 men killed and wounded, and 2 guns - there were also a few soft-skins lost, including the Jeep from HQ 2 NZ Cav.
I doubt this would work as well with a more substantial defending group - a weak two battalion force can't hold this many approaches for any length of time. As I advanced through the night I did think that I'd lost the bulk of his forces, as I failed to contact any of the units that were known to be in the Anthili area, and it was both a relief and a shock to see so much 'caught in the net'. I think that it should be medals all round for 2/8 Fd and their bridging platoon.
