To follow along here, start up a new game of the tutorial scenario. It will open to turn 1 on the Axis side (player 1 turn).
***********Amphibious Invasion ***********
No messing around here. Let’s get to the good part!
Amphibious Movement & Landings
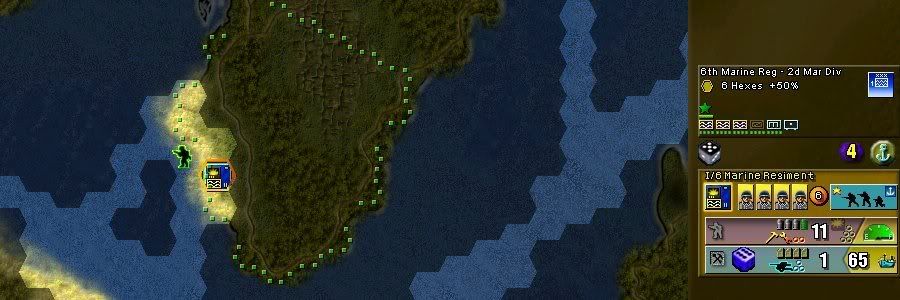
Select I battalion of 6 Marine Regiment in hex (13, 53) by clicking on the stack of units in that hex. I/6 Marine Regiment starts the game in amphibious movement mode. Once landed ashore, the unit reverts to its normal leg movement type.
Notice how the sea lanes become highlighted when the unit is selected. This shows where the unit can move to this turn.
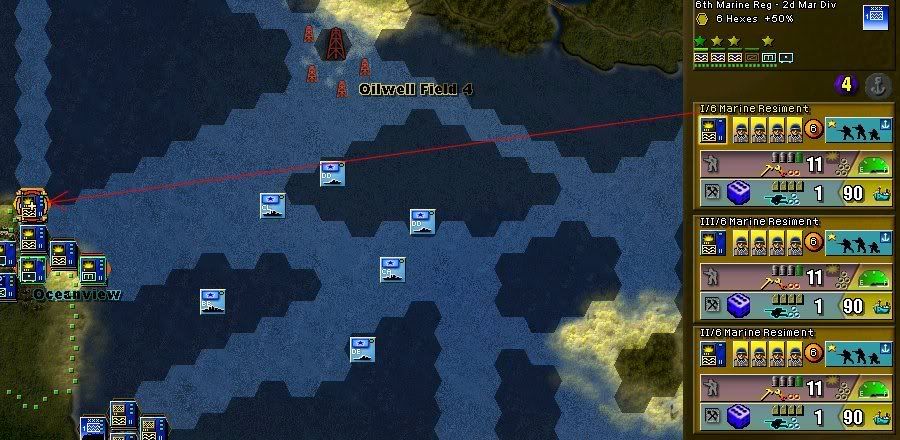
Let’s move 6 Marine Regiment to a landing beach. In Battlefront only one unit can move at a time. So we’ll start with I/6 Marines.
Move the mouse cursor. It will show a green running man when over a possible movement location and a red slashed circle when the cursor is over a hex the unit cannot move to.
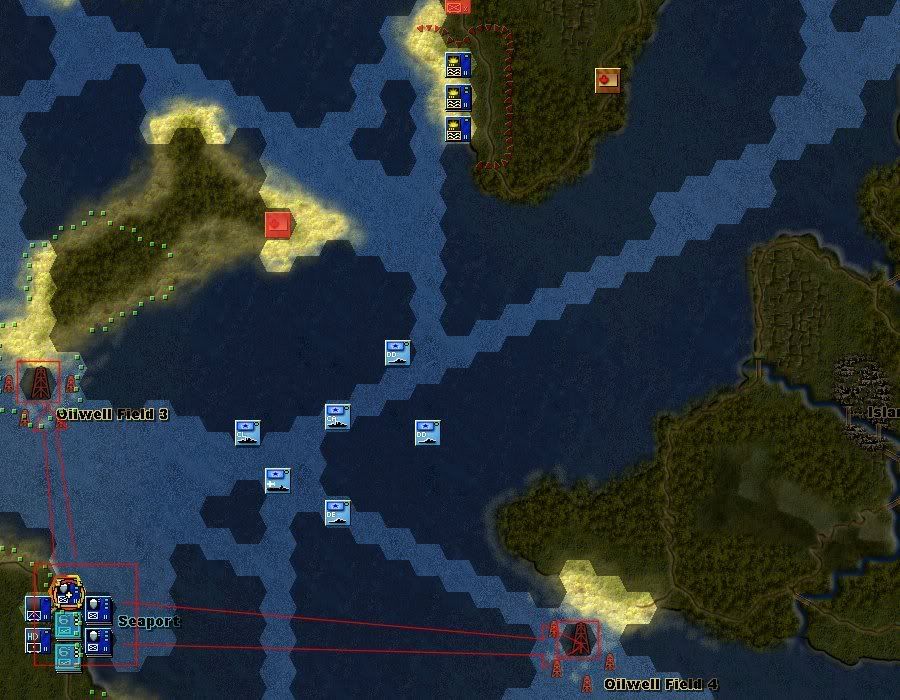
Move the mouse cursor to hex (19, 31).

Click and hold on hex (19, 31). Note how a path of green arrows shows the auto path from starting location to hex (19, 31). If you move the cursor (while still holding the click) you can see how many movement points will remain after moving to hex (19, 31).
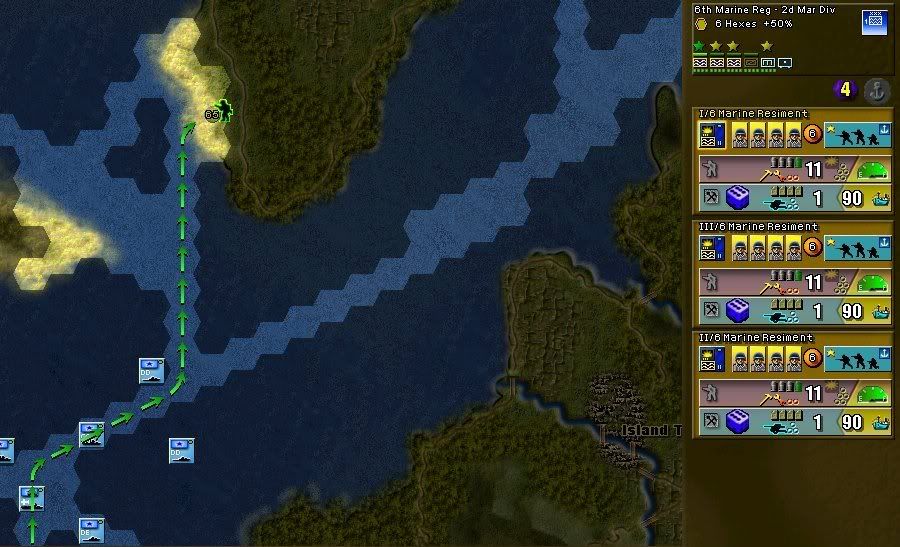
Now, with the cursor over hex (19, 31) release the click. The unit will auto move. Note that it still has movement capability left (we won’t use it as we’ve reached the landing spot).
Now move the other two units of 6 Marine Regiment to the same beach as I/6 Marines.
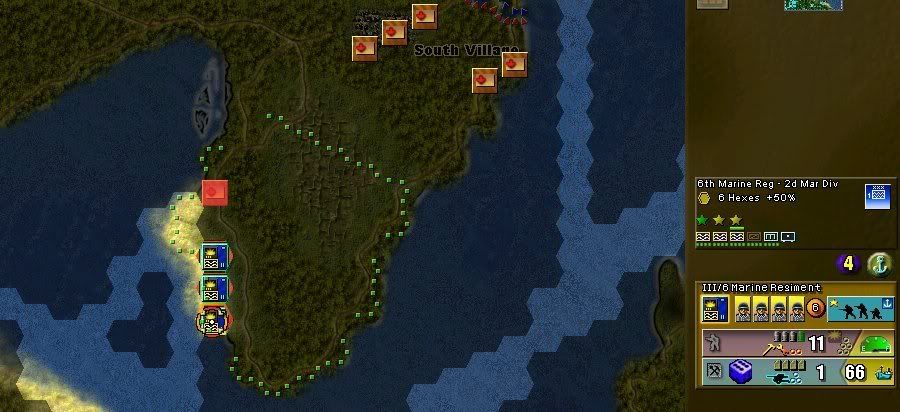
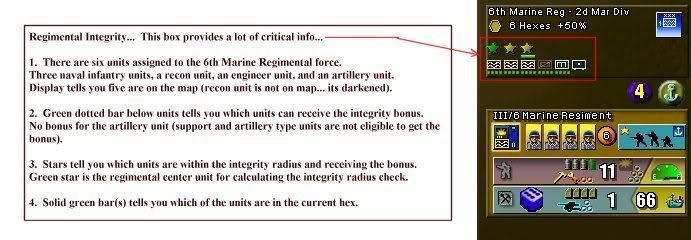
Here’s a quick rundown on regimental integrity. Notice that we’ve left the supporting engineer unit behind…
Let’s find the engineers! Too easy. Click on the engineer icon in the regimental integrity display.
There they are…
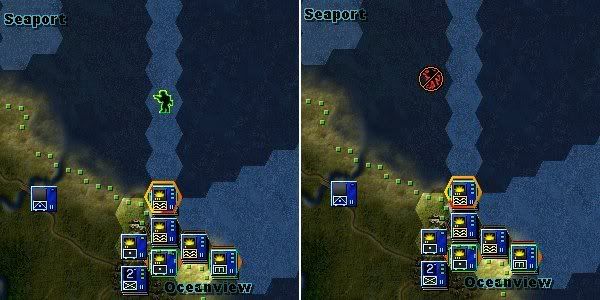
Let’s get them to the beach and begin the amphibious landings. They are already selected so move the mouse cursor to hex (19, 31) and click there to move the engineers. Notice how the display changes after moving the units.
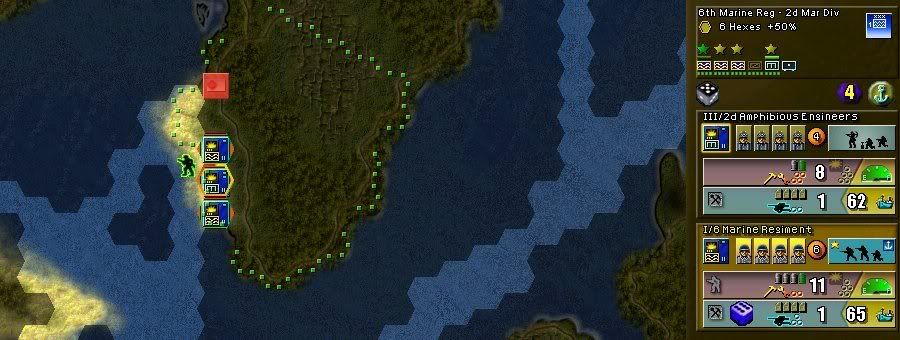
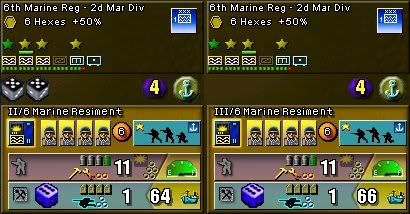
You can see that the engineers are now receiving the regimental integrity bonus and that there are now two units of the regimental integrity group in hex (19, 31). What about that black die? Looks a little ominous… means that there is a 33% chance that one step of the unit will be a casualty on landing. There can be up to four black dice present for a four step unit trying to come ashore. Each die is rolled independently for a landing.
Time to land the regiment. Click on the anchor to land the unit.
Results may be different for you, but my engineers took it on the chin… landing craft overturned, well aimed machine gun fire, and Marines disembarking too soon and sinking in deep water…
In the image above, note how one of the four green dots below the engineer symbol in the regimental integrity display turned red… more instant info on how strong the regimental group is!. The dotted bar below the units shows the number steps for the unit... green means step in place and red means the step has been lost.
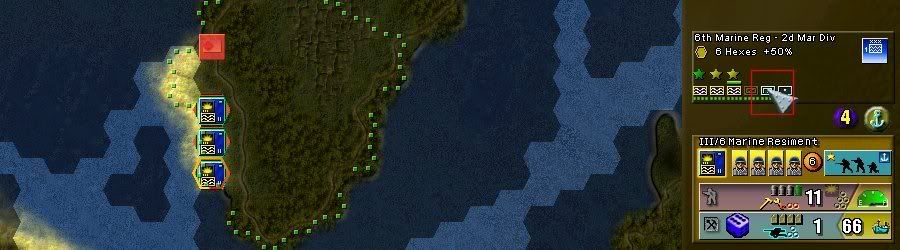
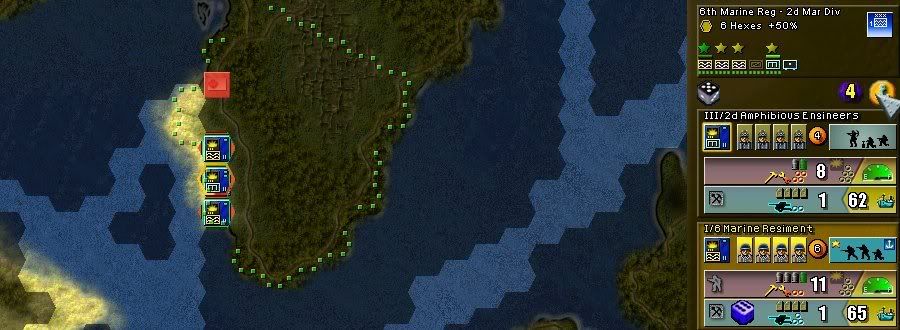
You can see that the unit now has 8 leg movement OP’s… but cannot use extended movement (double arrows made less distinct). In the main map area you can see which hexes the engineers can reach this turn with the 8 available movement OP’s.
Repeat the landing process for the three naval infantry battalions. Note how the unit in hex (19, 30)… closest to visible enemy has to undergo two black dice to land, while the unit furthest away from enemy in hex (19, 32) doesn’t have to mess around with any black dice! Landing attrition is based on how many enemy steps are within the landing area. The purple 4 tells you how many hexes away enemy units can be present to cause the dreaded black die… more enemy present, more black dice that must be dealt with… one good thing is that the max number of black dice equals the units number of steps present (only one black die per step).
Let’s leave those four units on the beach for now. We’ll come back to them in a little bit.
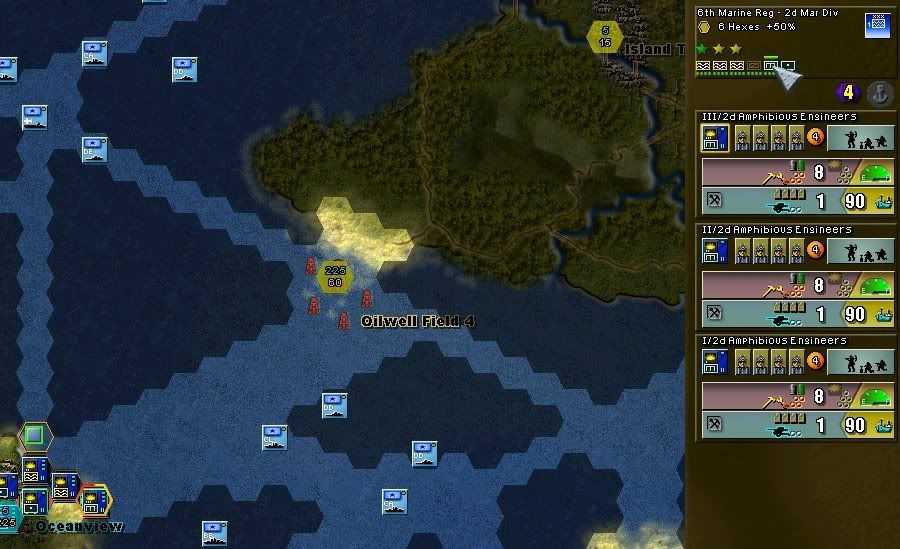
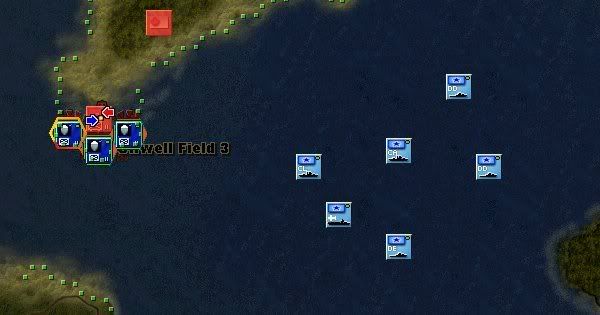
Select the 1st Special Service Regiment in hex (6, 46). We’ll use it to take the Oilwell Field 3 (VP Objective).
Move each battalion so that three sides of the VP Objective have 1st Special Service Regiment units next to them. Land the three battalions.

Close Combat!
Close combat takes place by attacking from adjacent hexsides. The more hexsides you attack from, generally speaking, the better. Select one of the battalions and move it over the defending unit. You’ll see opposing arrows. Close combat is possible!
Click on the defending unit to open the close combat screen.
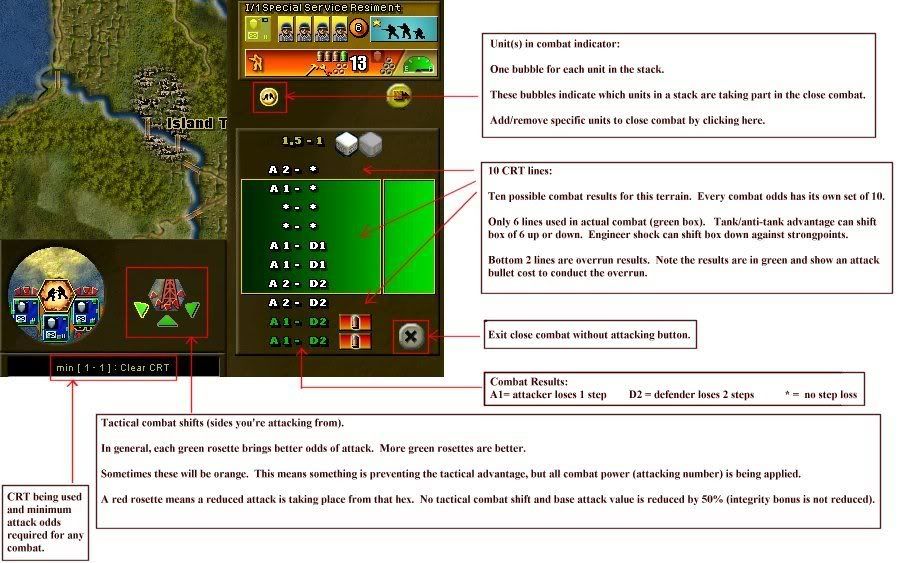
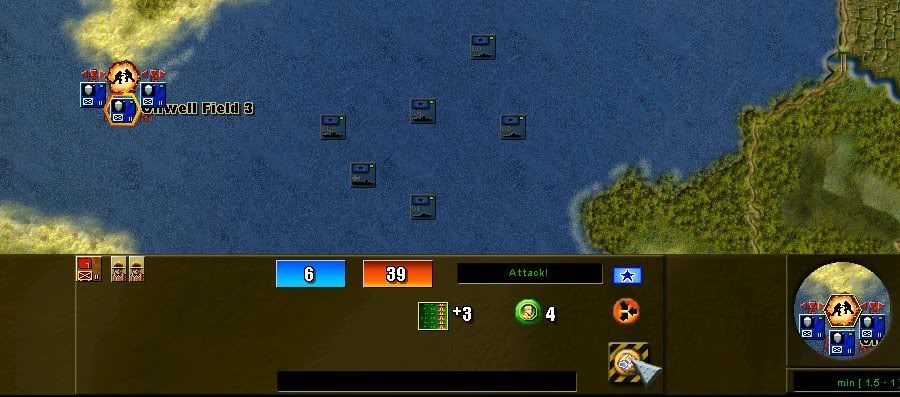
Wow. Lotta stuff going on here… Let’s break it down.
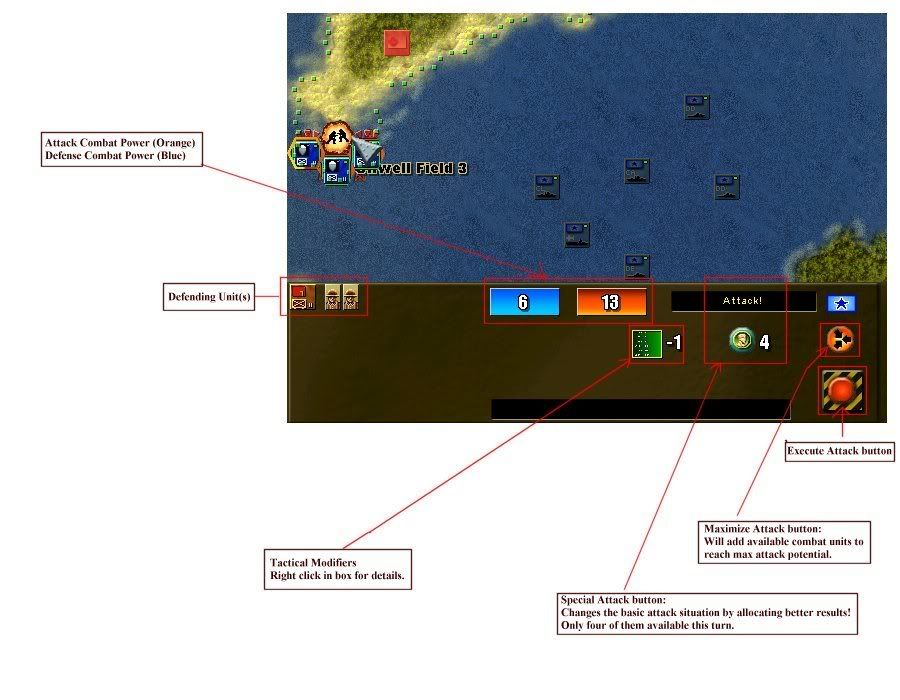
One battalion attacking alone won’t get the job done here. Let’s throw in the other two. You can select the other attacking hexes by clicking on the stack visible on the map or by clicking on the colored rosette at the bottom right of screen.
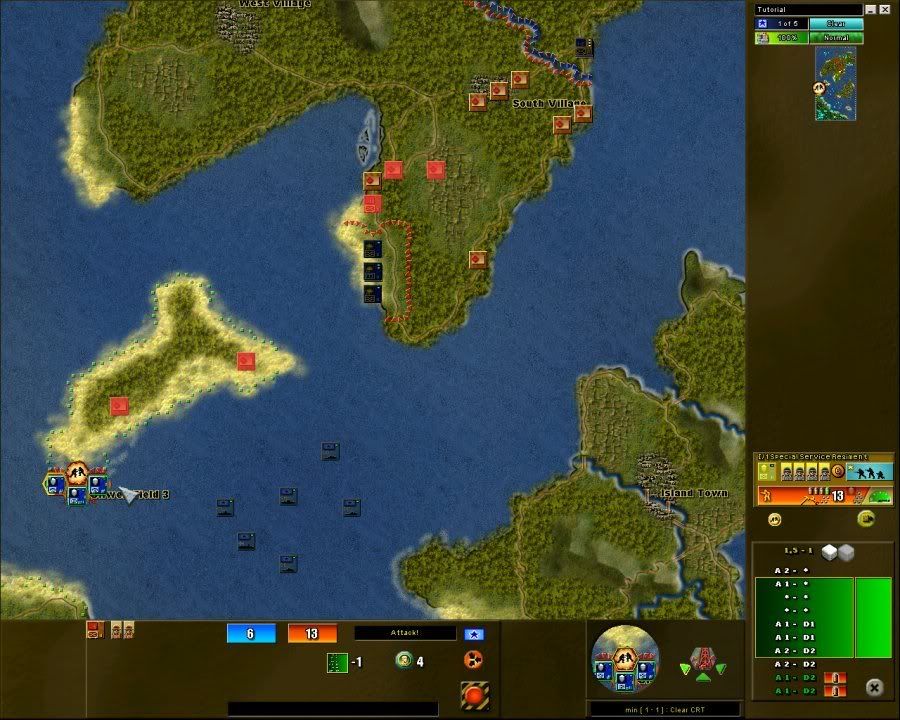
With all three units attacking things look pretty good. 67% chance of taking out the defending two step unit (4 of 6 CRT lines have a D2 result). Hmmm, 1/3 chance of the defenders surviving and likely retreating to another area of the oilwell field (DR means the defending stack will retreat).
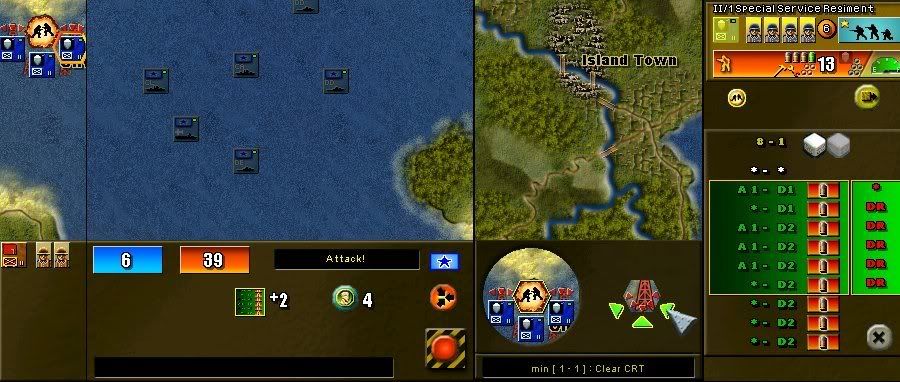
Not what we want here. So our choices are throw more units and attack from another hexside OR since we have 4 special attacks available let’s see what one of these does…click on the button below Attack!. This will get the job done right the first time.
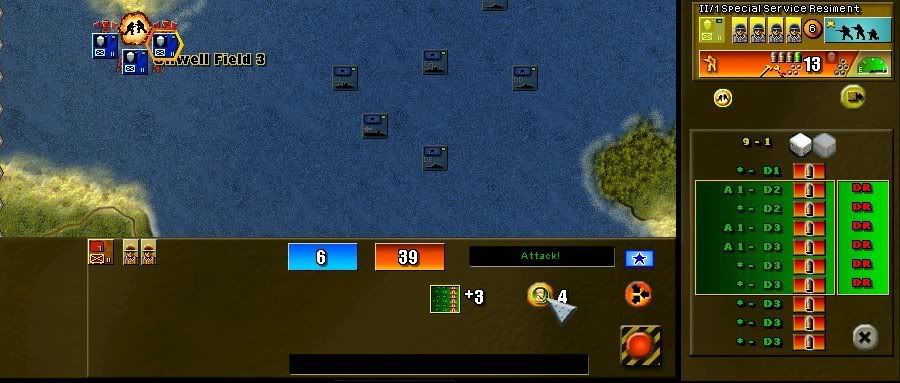
Now click on the execute close combat button to resolve combat.
Results will be different based on random die generator result. Mine was a 1 die for combat (green die) and a 5 die for retreat (red die).

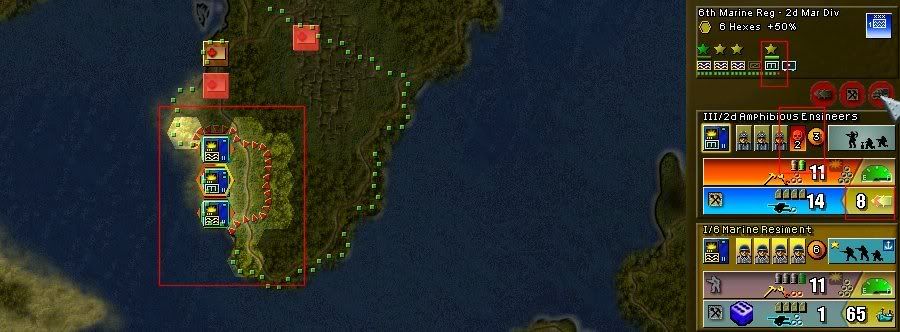
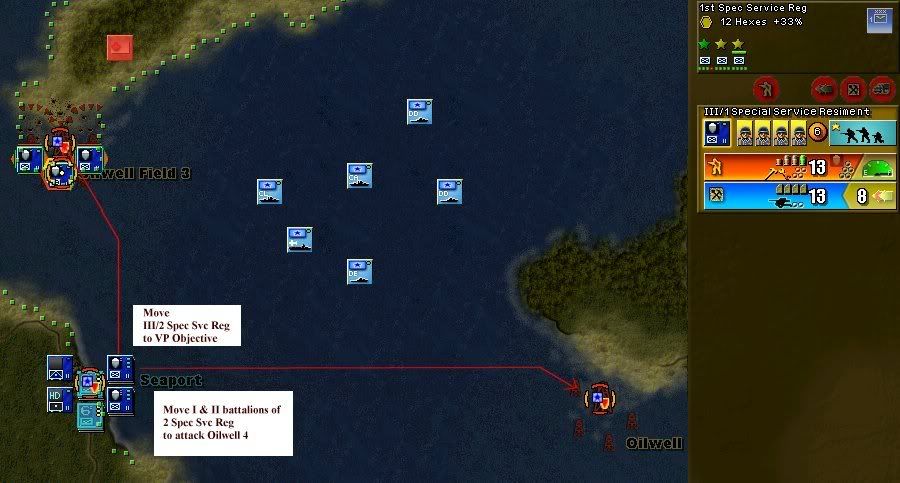
Defenders are now gone. Notice that none of the three units of 1 Special Service Regiment has enough movement Ops available to move into the VP Objective hex. Now that we’ve taken it, let’s secure it properly. Move III battalion of 2 Special Service Regiment into the VP Objective and conduct amphibious landing there. I & II battalions of 2 Special Service Regiment can be moved into attack position next to the other Oilwell objective.
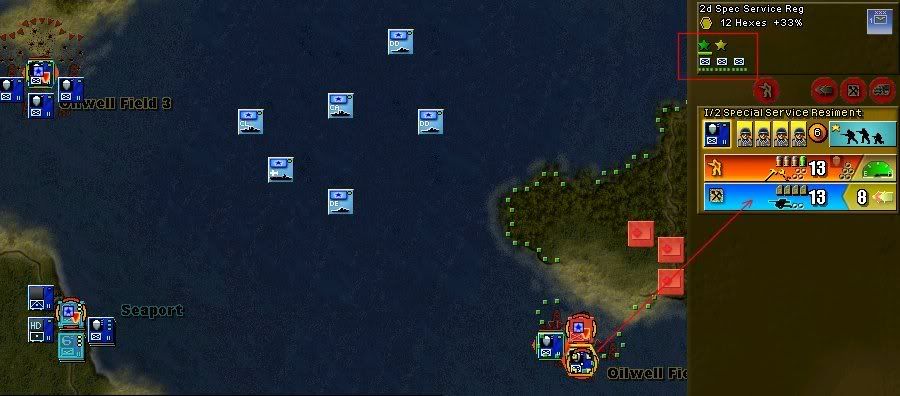
Your game should look something like this now. Note that I & II battalions of 2 Special Service Regiment are receiving the regimental integrity bonus even though III battalion is outside the radius (very different concept from the Decisive Battles series).
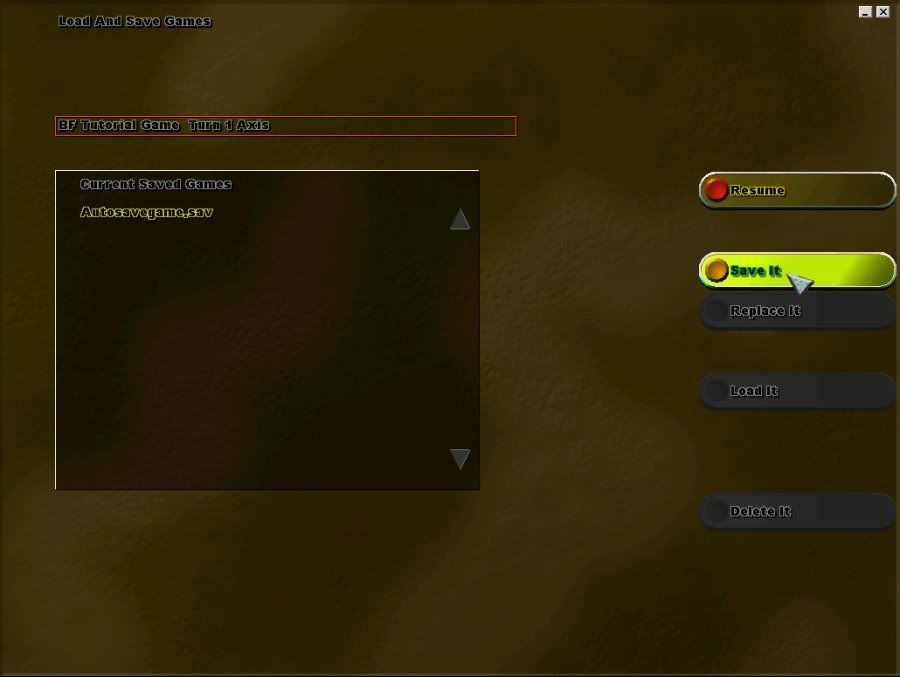
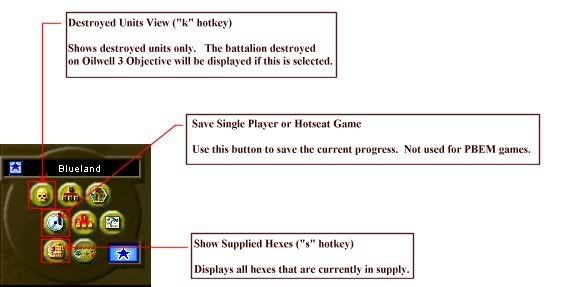
That’s enough for this part. Let’s save your progress now. Click on the save game button.
This brings up the save game menu. Click in the file name box as shown below and type in the save game file name you wish to use.
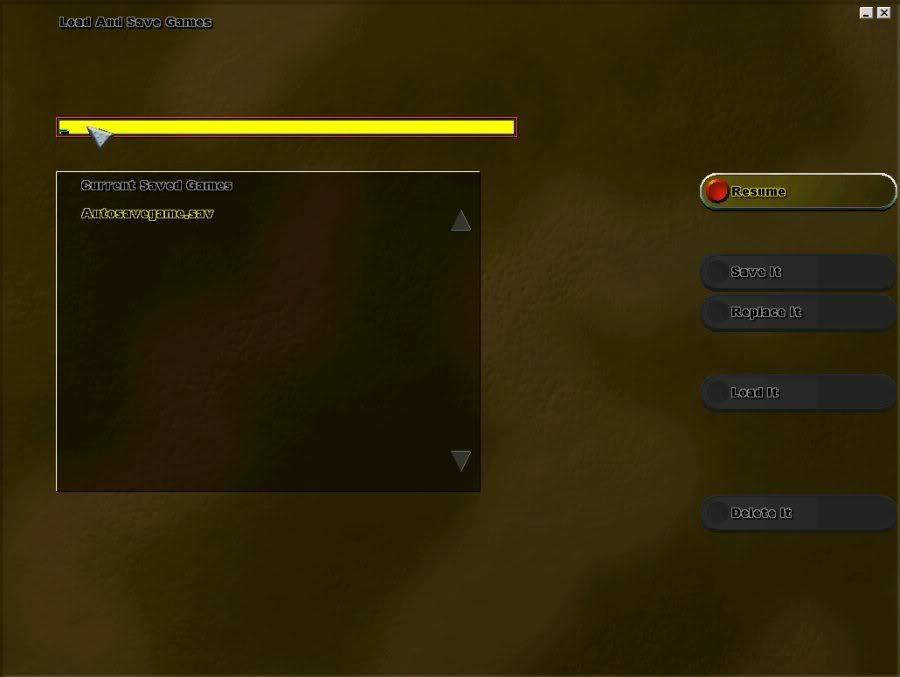
Once you’ve typed the file name, hit Enter on your keyboard to bring up the save file option and save the game.